Are your looking for a fun way to work off the extra pounds? Have you tried workouts before and struggled to maintain it?
Are you considering hula hoop workouts?
If so, then you will love this article!!!
Hi, I’m Scarlett from Hoop Plus Fit, professional hula hoop teacher performer with over 12 years hooping experience.
In this article, I’ll show you…
On top of all that:
Guided hula hoop workouts with me that will get you moving today! Add these workouts to your daily routine and you will see results.
Designed for your level – Beginner and experienced hooper workouts available – find the best hula hoop workout for you!
15 Hula hoop workouts for the abs arms and legs
These hula hoop workouts will make you work up a sweat and work the abdominal area while having fun! The majority will work the abs, however the legs and arms will also get a workout too.
Absolute beginners and experienced hula hoopers can benefit from these exercises. Put on your favourite your favourite music and give these hula hoop workouts a try! Or try a guided workout with me on my YouTube channel – Hoop Plus Fit.
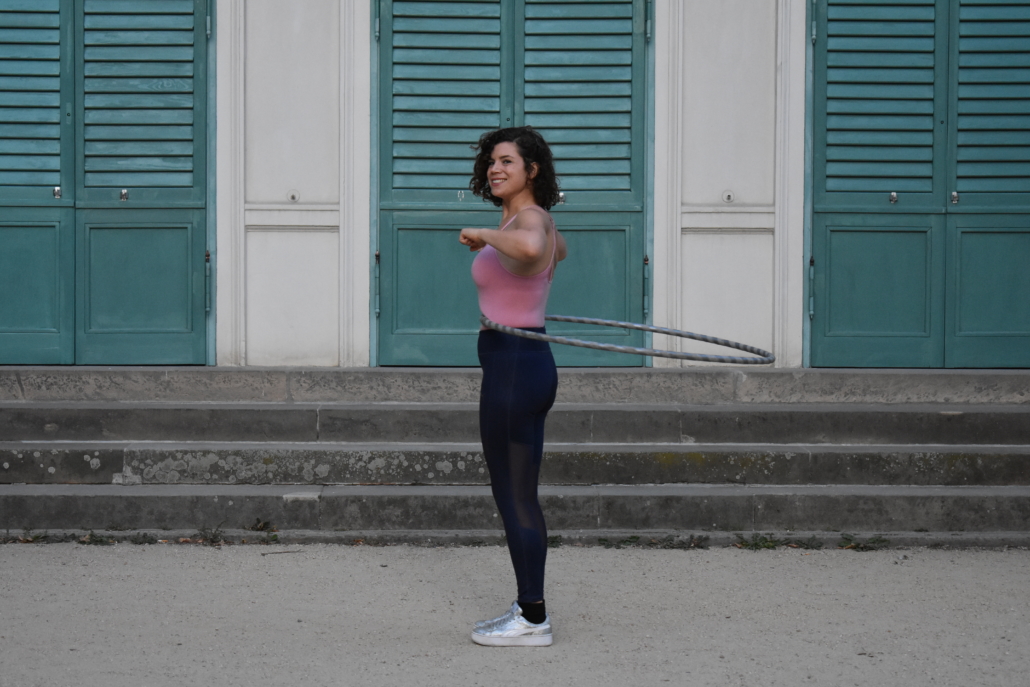
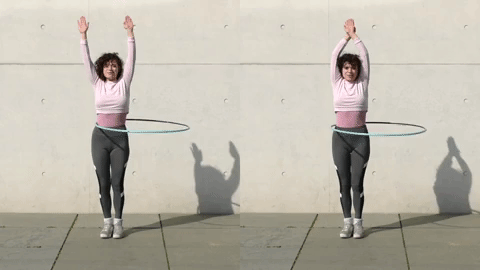
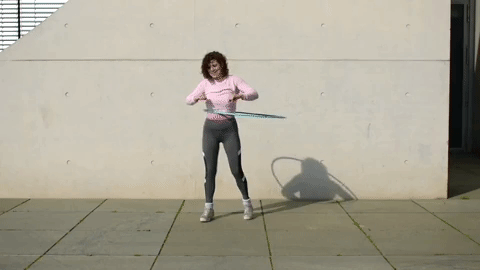
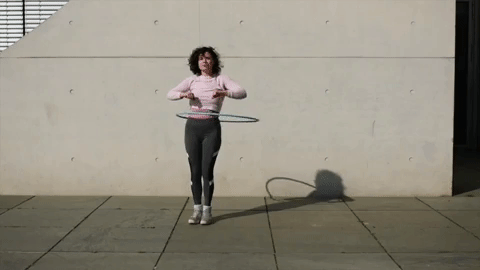
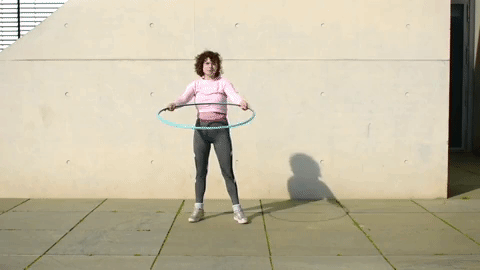
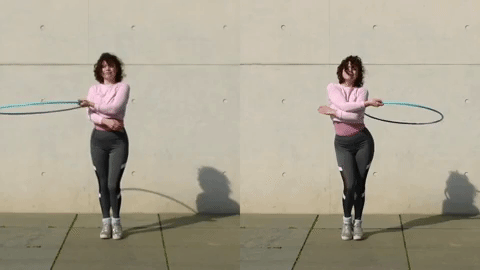
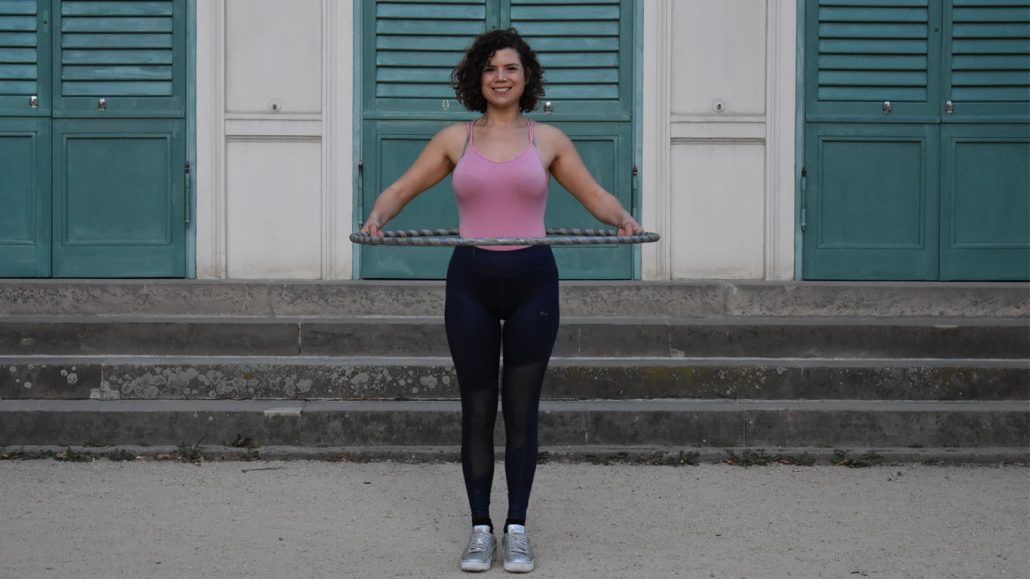
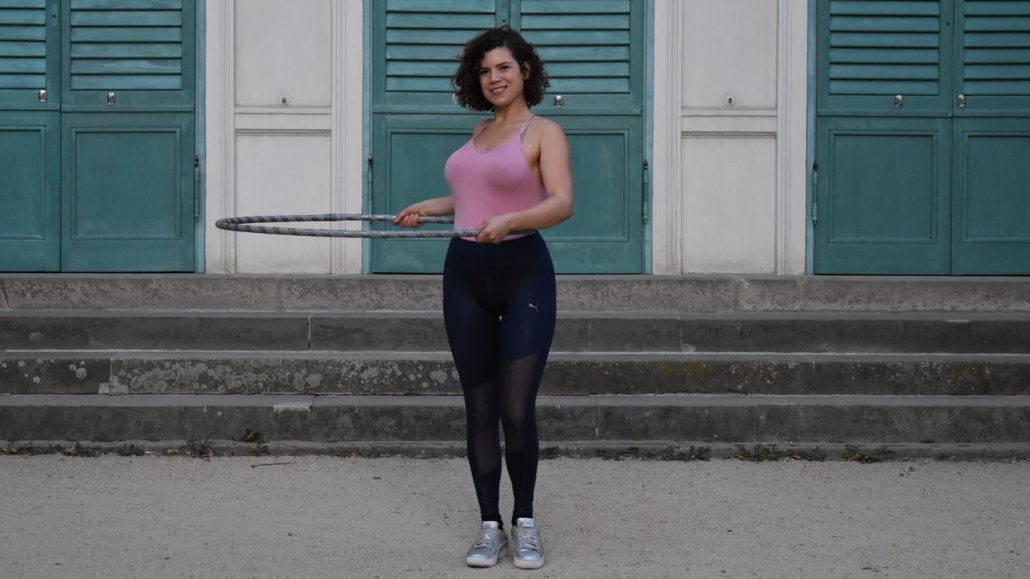
1# Waist hooping: The core of it all
Waist hooping lays the foundation for all hula hoop workouts – it’s the first and also most important skill. Follow my instructions and you will get a great workout from step 1.
How to do it:
Why you should do it: By focusing on rotating the hoop in a back and fourth motion from the belly you get a strong core workout. It is possible to hoop by moving your hips side to side however that motion does not work out the core muscles to the same extent. My top tips:
Now stop the hoop, reverse it and do the same on the other side: Adopt the same position as before except this time wind the hoop up in the opposite direction. This can be a challenge, particularly in the beginning of your hoop journey. Training out weaker side means that we develop even muscles across the core. In particular we are protecting our backs from injury by ensuring an even distribution of muscle development. It may not be as fun at first but with practice anything is possible.
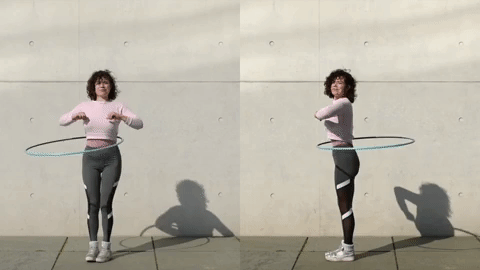
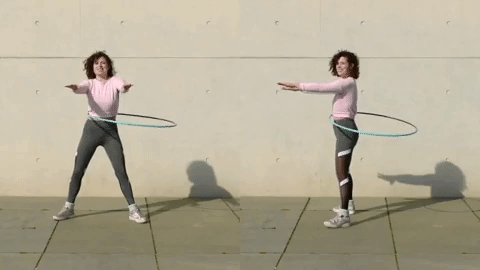
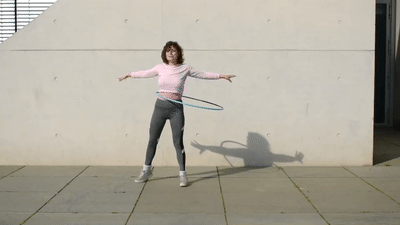
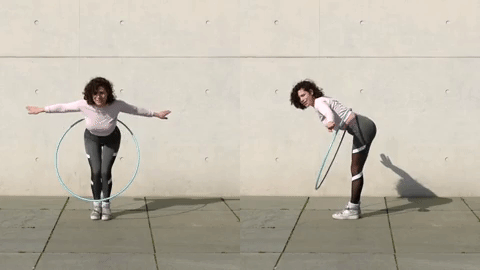
2# Christ the Redeemer
Imagine you are the Christ the Redeemer statue in Rio de Janiero, Brazil. Bring your arms out to the side, while maintaining your waist hooping.
How to do it:
Why you should do it: By pulling our arms out to the side we start to elongate the abs as we work them. It makes it more of a challenge to keep the hoop up but also builds greater strength. My top tips:
Now stop the hoop, reverse it and do the same on the other side: If the hoop won’t stay up in the weak direction in this exercise, you can take a step back to the previous exercise – so in this case it would be ‘2# Waist hooping – Arms in neutral – Weak direction’.
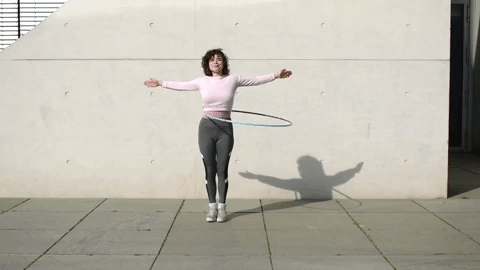
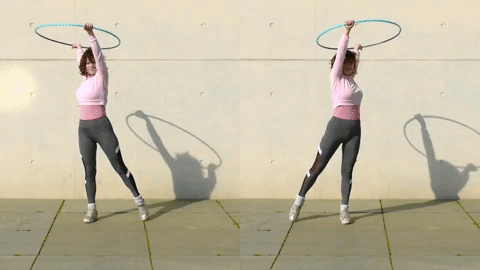
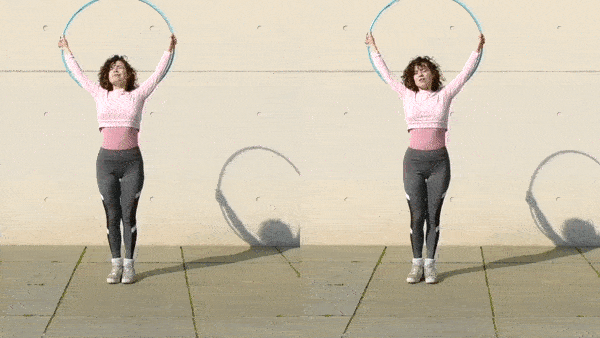
3# The Skyscraper
Continue waist hooping and raise your arms to to the sky – This one really challenges you makes an awesome workout! It’s also great preparation for multi hooping.
How to do it:
Why you should do it: By lifting our arms even higher we lengthen the abdominal muscles even more. This exercise not only works the abs harder, it also prepares you for the first multi-hooping exercise – waist and hand. Tips:
Now stop the hoop, reverse it and do the same on the other side: If the hoop really won’t stay up in the weak direction in this exercise, you can take a step back to the previous exercise – so in this case it would be back to ‘2# Christ the Redeemer’
4# Ballet legs – Right
Imagine you’re a ballerina! Point your toes – straight legs. This one is great for improving your balance!
How to do it:
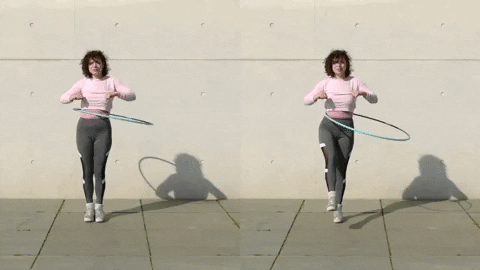
Why you should do it: This exercise helps to improve your balance as well as strengthening the core. By decreasing your stability you force the core muscles to work harder to keep the hoop spinning. When lifting your leg in the air you also get a stronger workout in the oblique muscles. As well as woking the hip abductors and gluteus maximus and minimus. My top tips:
Now stop the hoop, reverse it and do the same on the other side: You may be able to lift your leg while spinning in your dominant direction but not in your weal one. That’s ok, we need to build this strength. So if you need to, take a step back and keep your extended toe on the ground for stability.
5# Ballet legs – Left
Now take to the left leg – Go back to hooping on your dominant side, phew!
How to do it:

My top tips:
Now stop the hoop, reverse it and do the same on the other side: You may be able to lift your leg while spinning in your dominant direction but not in your weal one. That’s ok, we need to build this strength. So if you need to, take a step back and keep your extended toe on the ground for stability.
6# The Booty Builder
Want a Beyoncé booty? This waist hooping / Plié squats combo will work your glutes up a treat!
Why you should do it: Plié squats engage your glutes and inner thighs. By strengthening these muscles you are working towards a curvier, more lifted booty. It won’t make you look You’re not necessarily going to look like Kim Kardashian over night but doing this exercise regularly will give your butt a noticeable lift. It also works to open the hips and improve flexibility in this area. My top tips:
Now stop the hoop, reverse it and do the same on the other side: Work to get the hoop comfortable on your weaker side with your feet in the Plié position first. Start to sink down only when this feels comfortable.
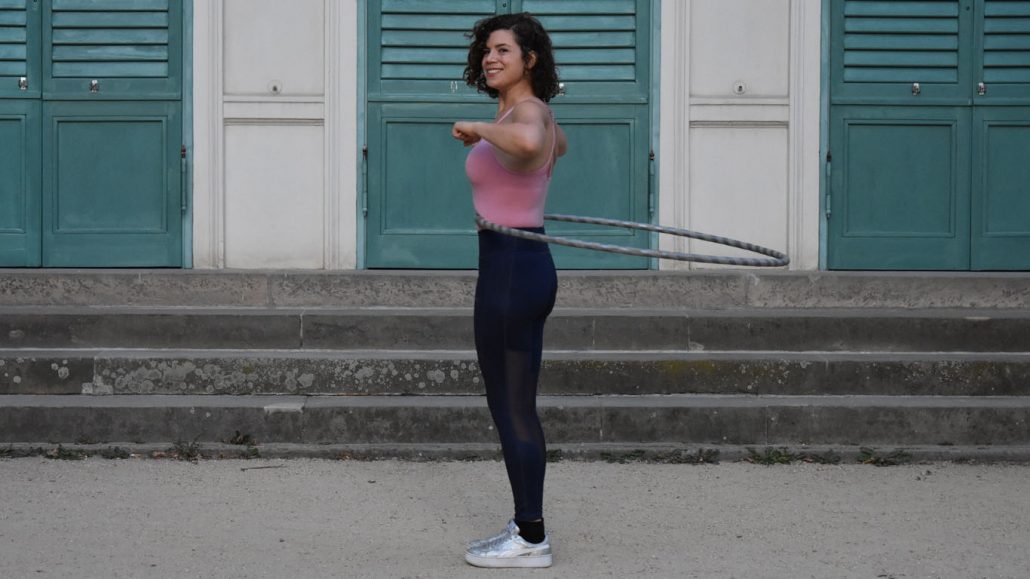
7# 4 Point Pivot
Turn in a circle – same direction as the hoop spin.
If you’re spinning right-to-left, then your ‘inner foot’ = left foot. If you’re spinning left-to-right then your ‘inner foot’ = right foot.
How to do it:
Why you should do it: This workout is great for improving your balance, coordination and timing. The more you put in the more you’ll get out. The waist hooping and arm movement works the abs, while the leg raises work the legs. My top tips:
Now stop the hoop, reverse it and do the same on the other side: Stability is key. Make sure the hoop feels stable before you turn.
8# 360 Anti-Spin
Now you will spin in the opposite direction as your hula hoop. This is harder and you will need to pump harder.
How to do it:
Why you should do it: Spinning the opposite direction as your hula hoop causes you to pump harder and faster. This will raise your pulse and get the blood pumping more. It also improves balance, coordination and timing. All essential skills for hula hooping. My top tips:
Now stop the hoop, reverse it and do the same on the other side: Get the hoop spinning fast before you anti spin.
9# Funky Side Step
Introducing the fancy footwork! Getting your feet moving ins the first step to freedom of movement with the hoop.
How to do it:
Why: These side steps not only engage the core muscles but also improve balance and coordination. If you’re interested in dancing with your hoop then this is the fist step to getting moving. My top tips:
Now stop the hoop, reverse it and do the same on the other side: You may need to move a little slower and take longer to stabilise yourself yourself after reach step. However it’s possible! Just keep at it.
10# The Lightning Bolt
This is essentially an air crunch, while using the hoop to keep even spacing between arms and body.
How to do it:
My top tips:
Now stop the hoop, reverse it and do the same on the other side: Maybe your balance is better on one side than the other. That’s ok, thats why we’re here, to work on it.
11# Do the twist
This is an awesome warm-up / cool-down move – Try to time your twists to the beat.
Why you should do it: Twisting exercises like this one are great for the digestive system and massaging the organs. After the ab workouts from the previous exercises this one should feel really great! My top tips:
12 # The Smear
Smear the hoop around the body. Keep your body in the centre of the hoop. I love to let myself go in the music with this move
- Legs: Feet begin planted to the ground. They can be together (more challenging) or hip width apart (more stable), whichever you feel more comfortable with.
- Arms: Hold the hoop with both hands at the half way point. Hands hold from inside of the hoop, wrists facing out. Bring the hoop to the horizontal plane with your body in the centre of the hoop. Keep it a flat as possible!.
- Action: You hoop is in the horizontal plane. Imagine there is a surface a small distance below (aprox. 30 cm or 12 inches). Dip the hoop down at the front, so it touches the surface. Then roll it around to the side, keeping only one point of contact with the hoop and imaginary surface. Continue to roll around to the back, side and then to the front again.
- Action: Once you’ve got this action down, you can get bigger with your movements until the hoop smears across your body. Here you want to rock the hoop across the front and back and smear the hoop at the side by your hip.

Why you should do it: This exercise works into your arms and shoulders. Depending on how big you make your movements, you can also work the abdominals and back muscles. This is also a great one to start dancing with. For those of you out there who like to boogie and want to hoop dance, then close your eyes, listen to the music and try to do this action while moving your body to the beat. My top tips:
Now stop the hoop, reverse it and do the same on the other side: I like to pick a point that the hoop has to hit before I reverse it. Wait until the hoop is at the highest point behind your body. Then reverse it!
13# The Vertical Body Blaster
Time to bend over! Bob on your knees and keep the hoop spinning in the no. 7 position.
How to do it:
Why you should do it: Simply holding your body in this position is enough to engage and strengthen the core muscles from front to back. Keeping the hoop spinning here intensifies the workout. It’s also makes for a great hula hoop photo. My top tips:
Now stop the hoop, reverse it and do the same on the other side: Again, the weaker side is challenging. If you can only manage a couple of rotations before the hoop falls, then pick it up, start it again. And again. And again.
14# Hit Me (Baby)
Time to get funky! This one os a light workout for the arms bit also a great move to start dancing with.
How to do it:
Why you should do it: This is a great workout for the arms and wrists. Work to keep the hoop as flat as possible, the more you do this the greater the workout for the arm area. For the hoop dancers out there, this is a great transition move when the hoop is in the horizontal plane. My top tips:
15# Side Stretch
This side stretch feels awesome after the workout – stretch it out, you deserve it!
Why you should do it: This is a great exercise to stretch out the obliques. You can do this before and/or after your waist hooping workout. This should feel really good afterwards – I often use this as a resting pose in my classes. My top tips:
Guided hula hoop workouts
If you really want to see results then you should drill these exercises for one minute in both your dominant and weak directions. For a free workout videos click here.
Whether you’re a complete beginner or have been swinging your hoop for a while these exercises are suitable for you. Beginners can benefit from the simplicity of the moves, while more experienced hoopers can work to neaten and perfect their body position.
This hula hoop workout is also lays the foundations for multi hooping (hula hooping on multiple parts of the body). So if multi hooping is part of your hoop goals then this is a great workout to train.
5 minute hula hoop workout for beginners
5 minute hula hoop workout for experienced hoopers
Which hoop is right for me?
The answer to this depends on a number of factors:
My guide to choosing the right hoop for you
General tips for choosing the right hoop for this workout:
Beginners
Experienced Hoopers
Hooping in both directions
Like most people are either right or left handed, the same goes for hula hooping. Ever tried to write your name with your weaker hand?
It usually looks like a three year old has done it. Not the same as the refined script you can achieve with your dominant hand, I’m sure!
However, with practice it is possible to write neatly with your weak hand… And the same goes for hula hooping.
Now, I know it might not be as much fun at first. Beginners might find this really difficult (but not impossible). Experienced hoopers might be taken back to the beginning of their hoop journey. Which, may not feel as good as spinning in the dominant direction.
However! Hooping in just one direction can cause you to develop more muscles on one side of your body. In time this can cause problems with your back. So it’s super important to train both sides.
Getting good in your weaker direction will not only balance you out, but also greatly improve your dominant direction.
Waist hooping
Getting the hoop to spin around the waist is the first step in your hoop journey. It is the core of the hula hoop ab workout, so the first goal is to get this comfortable.
Beginners – tips for waist hooping:
Experienced hoopers – tips for waist hooping
In Conclusion
Waist hooping is a fantastic way to get the blood pumping and strengthen the core! By following these 15 hula hoop workouts on a regular basis, I can guarantee that you will feel stronger in the core.
Waist hooping is the first and most important skill to get. It lays the foundation for the rest of the exercises so try to get this one comfortable first.
Be sure to practice in both directions. This may not feel as fun at first, but it’s worth it. It not only protects your back but also makes your good side better!
Practice makes perfect! Some things may be difficult at first, however with every try it gets easier. You just need to keep at it… And once it clicks, it gives you such an extreme sense of satisfaction, that it can become addiction.
