My Top 20 Hula Hoop Tricks

Are you n absolute beginner to hula hoop tricks? Do you want twist and twirl your hula hoop like a pro? Not sure where to start with it all?

Then this article will be great for you!

In this article I will

  • Breakdown my top hula hoop tricks for absolute beginners
  • Give tips to help you nail the tricks
  •  Suggest ways of progressing through experiment and play.
  •  Show you how to link them together in sequence
  •  Show you how to time your transitions to the music


Hoop tricks are a lots of fun and incredibly satisfying! I’ve met countless people who initially thought they couldn’t hula hoop, but with a little bit of instruction they were able to nail the basics within minutes! So can you too 😀

There are many hoop tricks to learn, and hoopers are inventing new ones all the time. It all comes from experimenting and playing and putting your own spin on things.

I’ve put together this selection of tricks for absolute beginners to get you flowing from day one! This sequence has been designed in a way that you can easily flow from one trick to the next.


#1 Basic Hand Hooping

This is the foundation of all hand hooping tricks. Once you’ve got this one down it will be much easier to get the rest of them. It is also a great transition move, so once you’ve got a few more tricks up your sleeve you can use this one to transition between them.

How:

  • For this trick you must keep your arm strong! You should be able to feel your biceps with your other hand
  • Place the hoop in your dominant hand (let’s make it easier for ourselves) – with your thumb between you and the hula hoop
  • To get it started you can push down with the other hand with force!
  • Once the hoop has started remember to keep the strength in your arm
  • Try both hands! Once you’ve got it on you dominant had try it all again with the other one.


Tips:

  • Keep your hand in a vertical position  – so facing the wall, not the floor
  • To keep the strength needed in your arm, you bring your arm close to your body.
  • If the hoop travels up your arm, then you can angle your arm down – keep it straight and let the hula hoop slow down and move down your arm. Eventually it will reach your hand again.


Experiment and Play

  •  Start with the hula hoop in the front plane – so the hula hoop is parallel to your body – get it steady and then experiment by turning your body 90 degrees
  • Keep your hand in exactly the same place – now the hula hoop should be in your side plane.
  •  Turn 90 degrees back towards the hoop – back to the front plan.
  • Try to stick your second hand in – you can rotate the hoop around both hands together in prayer position.
  • Take the first hand out – now you’re hand hooping with your weaker hand
  • Experiment with turning your body 90 degrees here too – so the hoop is back in you side plane.
  • This is a 180 in your body –  the hula hoop always stays in the same place.

#2 Hand Hoop Breaks

Ok, so you’ve got the first move down, well done! Next we want to play with changing the spinning direction of the hoop. Some tricks only work with certain spinning directions, so it’s handy to know how to change it.

How:

  • For the start we want to keep the hoop in the frontal plane – later we can experiment with doing this in the side plane and all other fancy stuff but for now, let’s face the hoop.
  • So! Start you basic hand hooping by pushing the hoop down with your opposite hand – The hula hoop should be spinning into you – What I mean by that is, if you extend your arm out to the side (right arm out to the right – left arm out to the left) then the hoop will move down > to the side > up > then down as it moves towards you.
  • As the hoop is moving downwards and towards you, you can place your hand underneath the hoop path and push it back to spin in the opposite direction
  • Now the hoop will be spinning in the opposite direction – So the hoop will be spinning away from you: Down > towards you > up >to the side.
  • Now when the hoop is coming upwards and towards you, you’ll need to place your hand above the hoop to send it in the opposite direction.
  • You can use you thumb to give your hoop an extra push, when sending it back in your second hand.

Tips:

  • Again, keep your arm strong and the hoop in your hand. This will help you to maintain control over the hoop.
  • If you try this trick and the hoop keeps on flying away. You can slow it down by catching the hoop with you free hand (rather than just tapping it) and send it in the opposite direction.
  • Think about where the hoop is hitting your hand – You’ll have more control if it hits the centre of your palm or the middle of your fingers.

Experiment and Play

  •  Once you’ve got these breaks in the frontal plane down, you can experiment with it on the side plane.
  •  Experiment breaking the hoop with your second hand behind the back
  •  Or play with breaking the hoop with other parts of the body. I like to break it under my armpit. But you can also play with breaking the hoop with your leg!

#3 Behind the back pass

In the fist trick we learned to pass the hoop from on hand to the other in front of the body, turning 180 degrees. With the addition of this Behind the Back Pass you will be able to turn your body a full 360 degrees with  the hoop staying in the same place.

How:

  • Start the hoop in your good hand, on the side plane –  The hoop must be spinning forward!
  • As the hoop starts to move down you’ll need to change your grip – I like to hold the hoop loosely in three fingers. However at the beginning you might want to hold the hoop in your hand.
  • So, as the hoop is coming down, turn your body away from the hula hoop until it’s behind you.
  • Your hand should be gripping from the inside with the wrist facing up
  • Bring your second hand to meet the fist behind your back with the wrist also facing up
  • Transfer your grip to the second hand
  • Turn 90 degrees and the hoop should be spinning backwards in your second hand.

Tips:

  • Slow the hoop down before you turn around. this will give you more time to transfer the hoop between hands
  • At the beginning you can hold onto the hoop for the transfer of hands
  • Remember both wrists should be facing the sky
  •  If you’re gripping the hoop – then once it is in your second had make sure you swing it up and back to give it enough force to continue spinning
  •  Once you get the hang of it, try to hold the hoop loosely in your fingers

Experiment and Play

  •  Once you get comfortable with this try truing 360 degrees, while keeping your hoop in the same place or continuous turns.
  • Remember to try this in both directions.

#4 Two Beat Weave

The Two Beat Weave is also known as the figure of 8. I just the symbol here because this is the shape you’ll be creating with your hoop in space. This is a super versatile move, which you can flow in and out of from many different positions.

How:

  • Start the hoop in your side plane, gripping your hoop from the inside with your wrist facing up.
  • Bring the hoop down, back and over your head. So you are drawing a circular shape the the hoop.
  • Now here’s the important bit! As you follow this circular shape downwards, bring the hoop across the the body.
  • So if you are starting with the hoop in your right hand, then at this point your right hand should be by your left hip, with your arm crossing your body.
  • From here, continue the flow upwards, bending at your elbow, with your wrist facing your body
  • Once the hoop reaches its highest point, swing the hoop back down to your side, where you’ll land back ion the starting position.
  • As this is a figure of 8 (also known as the sign of eternity) you can do this continuously or for eternity 😉

Tips:

  • Once you’ve got the basic move down, loosen your grip. I normally hold the hoop in just three fingers
  • Momentum really helps in this move, so don’t be afraid of the hoop and build up a bit of speed. This will help it flow

Experiment and Play

  • When you first start the movement is likely to be coming from your arm. However, once it feels more comfortable try to move it to your wrist. It looks a lot neater
  • Play with the position of your hoop, bringing the centre of the figure of 8 from in front of you to above your head

#5 Behind Back Hoop Toss

Love this move! Throws and tosses can be a little scary at first, at the beginning I avoided them as I wasn’t sure I’d be able to catch it again. But this lovely little move includes a little spin above the head that gives you the time to get the hoop back again. Also of your miss it, there are a number of great ways to style it out.

How:

  • Start in the same position as the Two Beat Weave, with the hand (and hoop) in your side plane, gripping from the inside, wrist facing up.
  • Again, you bring it down back and up in your circular motion.
  • However this time you keep the hoop on the same side you started on.
  • Bend forward as you follow the circular shape until your hand reaches your armpit
  • Once you feel the hoop on the back of your armpit, let go!
  • Then straighten up and catch the hoop above your head.

Tips:

  • Loosen your grip, when bringing the hoop towards your armpit. I like to take it just my index finger at this last moment. This makes it easier to let go at the perfect moment.
  • Bending forward is important. This will allow the hoop to spin above your head instead of flying backwards.
  • Check that your hand is really in your armpit, if it’s too far away this trick won’t work
  • Before trying, touch yourself on your target point, at the back of your armpit, right on the crease. It will be easier to tell afterwards whether you’ve his the same place or somewhere else on your body
  • It matters what you wear. Since making this video I realised I should have taken off my baggy jumper. It stopped my hoop from reaching the right place and kept on flying backwards :/

Experiment and Play

  • Play with the speed and swing of your hoop, how high cam you get it to go without loosing control.
  • Play with where you catch the hoop. I like to catch it from underneath (hand gripping from the outside) and strike a pose.
  • however you can also catch it from inside your hoop and go back into your two beat weave.
  • You might not always catch it the way you intended, if you’re finding it hard to catch it with your hand, then try to get your arm in. from her you can spin your body 360 and the hoop will slide into your hand.

# 6 Jump through

Fir this trick we’ll be…. Yes you guessed it, jumping through the hoop. It’s a great one to flow into from your Two Beat Weave and an awesome way to transition from the side to the front plane.

How:

  • Start in the same position as the Two Beat Weave, with the hand (and hoop) in your side plane, gripping from the inside, wrist facing up.
  • Again, you bring it down back and up in your circular motion.
  • As you bring the hoop down position the hoop in front of you, towards your belly button with your wrist facing your body.
  • Jump over the hoop, it can be a small hop.
  • Simultaneously lift the hoop up, with a light grip and the hoop should fly over your head.
  • The hoop will land in your front plane, ready for your next move

Tips:

  • As you bring your hoop in front, try to place it so the base if thew hoop does not hit the floor.
  • Just a cm or two off the ground is enough
  • Have a loose grip as you are lifting your hand up.
  •  Lift your arm up quickly and as the hoop is coming down in front of your tighten your grip to control the speed of movement.

Experiment and Play

  • Play with the speed of the hoop as it comes down you can make it look like slow motion
  • Play with your jump, try a pony hop or both feet together, see what feels right

# 7 Beat Pump

A beautiful and simple move I love to do when there is a prominent beat in the music. You can hit the hoop down on the first count and control the speed of the hoop so the move lasts till the fourth count

How:

  • Bring the hoop in front of you, with one hand gripping the hoop the top of the hoop from the outside and the bottom hand gripping the hoop from the inside
  • Both wrists should be facing down
  • The top hand then pushes the top of the hoop foward
  • Simultaneously the bottom hand rises up and the top hand catches the hoop at the bottom
  • The hands have now replaced each other and you can repeat this move over and over again

Tips:

  • You can control the speed of the hoop with the tightness of your grip.
  • A tighter grip will result in a slower hoop
  • Try to time the hit with a strong beat in the music

Experiment and Play

  • Put on your favourite song and really tune into the different components that make up the beat. Tune into one of them and time you Beat Pump with that part of the music

# 8 Smear

This is a great one to dance with! There are so many ways to play with this one and you can get your sassy style flowing from the get-go.

How:

  • Grip the hoop from the inside (wrists facing out)  with your hands on either side of the widest part of the circle
  • Your hands should be evenly placed, so bring the hoop in front of you to check whether you need to adjust your hands to the half way mark
  • Bring the hoop around you, parallel to your floor plane with your body in the centre of the hoop, your hands to the side and your elbows tucked in
  • Now, imagine that the hoop is a coin and there is a surface below and the coin rotates around on this surface
  • It will dip down at the front
  • Then dip down on the right side
  • Then at the back (we know its down at the back when its up at the front)
  • Dip don on the left and then roll it around to dip down on the front again
  • Keep this going around continuously

Tips:

  • Once you’ve got the basic move down take away the imaginary surface and let the movement of the hoop get so big that it smears across your body
  • Keep you hands to the side
  • If they are coming in front of you then slow it down: dip own at the side, up at the front, down on the side up at the front
  • remember to keep your body in the centre of the hoop

Experiment and Play

  • Try keeping your body still and the hoop (and your arms obviously) is the only thing that moves
  • Then experiment with keeping your upper body in the centre of the hoop and move like the hoop is controlling you
  • Play with reversing the direction and back again

# 9 Barrel Roll

This is the intro trick for isolations. Like an isolation, the hoop has to stay in the same place throughout. This can be a difficult concept to grasp, but have no fear. I’ve got some great tips to get you started!

How:

  • Grip the hoop from the inside (wrists facing out)  with your hands on either side of the widest part of the circle
  • Sick your head in the centre of the hoop
  • Turn your body 360 degrees while keeping your hoop in the same place

Tips:

  • Draw or find a line on the floor and line up your hoop with it. If you are out of like at the end of your turn, you’ll need to slow it down
  • At the beginning, its good to take small steps to turn around
  • Once you are familiar with what to do with your upper body, then try the leg twist
  • Look at one point of the hula hoop.

Experiment and Play

  • Play with taking small steps to turn around
  • Or cross one leg over the other and use your legs to spin you around

# 10 Two hand isolation

Now onto a real Isolation! This is a total crowd pleaser, guaranteed to impress your friends 🙂 There are a lot if things to think about at the same time. So we are starting with the two handed isolation.

How:

  • Hold the hoop in front of you with your eye line in the centre of the hoop
  • Grip the hoop from the inside at the top, with your wrist facing up
  • Your arm should be straight and strong.
  • Try to keep your arm straight at all times with the movement coming from your shoulder
  • Now imagine your hoop is a clock face and your hand is now at 12
  • Now try to take your hand to 9 (right handers) or 3 (left handers) while keeping the hoop in the same place, your arm should be crossing your body
  • Then take back up to 12
  • Practice this until it feels comfortable
  • Then try to take your hand all the way to 6 and then back to 12
  • Once this is comfortable you’ll be ready to get your second hand involved
  • Practice the same process with your second hand, starting at 6 and taking it to 3 (right handers) or 9 (left handers)
  • Once comfortable, start with the first hand at 12  again
  • When your gripping the hoop at 6, cross  and grip the hoop with your second hand over the first hand
  • The second hand is now in control, taking your hands to up to 12
  • Important: Both hands should always stay together!
  • The hand that isn’t gripping the hoop roles over the other, your hands should be back to back.
  • Keep this going, with the first hand taking your from 12 to 6 and the second hand taking you from 6 to 12.

Tips:

  • The most important advice I can give you is: Look through the hoop, not at the hoop!
  • Stare directly through it and it will be much easier to maintain the hoop in the same space throughout the trick.
  • Think of your hands as really good friends, they never want to be parted from each other
  • Remember to keep them back to back when transitioning between positions

Experiment and Play

  • Play with the speed of your movement
  • Make it fast while transitioning and slow when passing over the grip

# 11 Vertical Loop

A really lovely trick that looks fabulous with an LED hoop. You’re keeping the hoop vertical at all times and it makes a lovely illusion

How:

  • Hold the hoop vertically in front of your legs
  • Arms are crossed – right over left – gripping your hoop from the top
  • Bring your arms to the left, keeping your hoop in line with your side body
  • Use your right hand to hold the hoop on top of your left forearm
  • Continue to bring your arm around in this anti-clockwise circle
  • Until your arms are crossed above your head, wrists facing forward
  • Continue the circle. When your right arm is filly extended your left arm should be underneath
  • Continue the circle until you are back in the starting position.
  • You can either go around again, or reverse it!

Tips:

  • Maintain a firm grip on your hoop
  • The trick looks best when the hoop stays vertical

Experiment and Play

  • Play with the speed of your movement
  • Make it fast on the rise and slow as your arms cross over above your head

# 12 Escalator

The hoop makes a super satisfying whoosh sound when doing the Escalator.  It’s best to practice this on both sides, however for ease I’ll explain everything with the right hand. There are a number of things going on at the same time, but super satisfying!

How:

  • Hold the hoop to the side of you
  • Grip the hoop from the top with  your right hand, your wrist facing forward
  • Step your right leg into the hoop from the front
  • Put your weight in the right leg, so the left foot can lift easily
  • Keep the hoop vertical as you bring your hand to your bellybutton
  • This movement should be like a door on a hinge
  • Lift your left leg up while simultaneously bringing the hoop to your bellybutton
  • After your hand arrives at your bellybutton, lift your hand up
  • For Cheat Escalator: Keep you grip lose until the hoop flips over your head
  • For Escalator: Let go of the hoop as soon as it reaches your bellybutton and lift your hand in the air to receive the hoop

Tips:

  • For the Cheat Escalator, keep your grip loose, with you forefinger and thumb together
  • For Escalator, keep your left arm in the air, this will prevent the hoop from flying away


# 13 Reverse Escalator

What goes up must come down! So this move is the reverse of the previous one. It’s great to flow between the two.

How:

  • Start by holding the hoop in font of you
  • Hands gripping from the outside at the widest part of the hoop
  • Push the hoop with your left hand so it hinges around to behind your head
  • Let the hoop rest on the left side of your neck, with your right arm slightly forward
  • Let go of the hoop with your right hand
  • bring your right hand immediately down to receive it

Tips:

  • If the hoop stays on your shoulder, you can help it along by nudging your shoulder forward
  • Remember to bring your hand down to receive the hula hoop as soon as you let go


# 14 Floor Hand Spin

A simple yet beautiful hoop trick that looks fantastic with a LED hoop! It’s so simple it’s even a great one to teach to kids!

How:

  • Start with the hoop to the side of you
  • Bottom on the hoop resting on the floor, gripping the hoop from the top
  • Twist the hoop between your thumb and forefinger
  • Feel the centre of gravity as you twist the hoop
  • Once you’ve got a good momentum then open your hand flat
  • Keep slight pressure on the hoop, so you can keep the hoop vertical but don’t stop the spin


Tips:

  • It’s best to do this one on a smooth floor. Grass will make your life difficult
  • Make sure the centre of gravity is touching the floor.

Experiment and Play

  • Try out different poses while the hoop is spinning

# 15 Hit It!

This is a great way to get the hoop above the head. You can also dance a lot with this move. I started to play with this move after being inspired by swing dancers I was performing in the same show as.

How:

  • Start by gripping the hoop with your wrist facing up
  • Hit the hoop between your right and left side
  • To get it up in the air… (hoop in right hand) Hit the hoop to your right
  • as it swings back, lift your arm up high and open your hand
  • It is also possible to do this move with your wrist facing down
  • To transition to the hoop above the head, the hoop will need to rotate around your thumb to in order to get the hand inside

Tips:

  • Dance with this one!
  • Cross over both hands at the same time as the hoop crosses the body
  • Then pull both hands out

Experiment and Play

  • Play with making the movements big and get your legs involved too
  • Swing the hoop to the beat of your favourite music!

# 16 Hand Hooping Above The Head

This is pretty similar to the Basic Hand Hooping in #01, the difference being that its now above your head! The hoop is now in the horizontal plane, opening up a number of trick possibilities for you.

How:

  • Use the #15 Hit me move to get the hoop above the head
  • Open your hand
  • Keep your arm straight and strong
  • keep the hoop spinning bu subtly beating it with your hand

Tips:

  • If the hoop starts to get wonky (not flat), then you can grab the hoop as it comes into your hand and straighten it out with your grip
  • Keep a straight arm for neatness


# 17 Lasso

A dynamic trick that takes your hoop from high to low.

How:

  • Start with the hoop spinning above your head
  • The hoop should be spinning inwards – Right handers from right to left and Left handers from left to right
  • With the wrist facing forward, wait until you feel the hoop in your hand
  • grab the hoop with loose fingers
  • Begin to turn your wrist inward as you bring the hoop down,  in front of you
  • Your wrist should be facing up
  • Once the hoop reaches waist height, rotate your wrist over the hoop, facing down
  • Continue the rotation to face upward again, while lifing the hoop to the above the head position again
  • Open your hand

Tips:

  • If the hoop is quite big and your arms are quite short, you might need to bend over a bit
  • I like to stick my butt out and make a cute Betty Boop move
  • Keep your grip loose in your fingers and the action in your wrist


# 18 Behind The Back Pass

This is quite a tricky one but still achievable for beginners. The action is going on behind your back, so you really need to rely on how your body feels as it moves through space.

How:

  • Start with the hoop spinning above your head
  • The hoop should be spinning outward this time – Right handers from left to right and Left handers from right to left (I often do this with my left hand)
  • With the wrist facing forward, wait until you feel the hoop in your hand
  • grab the hoop with loose fingers
  • Begin to turn your wrist outward as you bring the hoop down,  behind your back
  • Bend over and bring your second hand to meet the first behind your back
  • Both wrists should be facing up
  • Grab the hoop with the second hand and bring it around and up
  • Keeping the wrist facing up until you’re back in the hoop above head position, wrist facing forward

Tips:

  • Practice spinning the hoop on your hand behind your back
  • Try this with just your index finger behind your back

Experiment and Play

  • Experiment with adding an extra spin behind the back
  • Try adding an extra twist bu crossing one leg over the other and twist out of the move as you rise.


# 19 Vertical Twist

This is a lovely vertical move, which looks great when your play around the speed of your movement.

How:

  • Start with the hoop standing vertically in front of you, hand gripping from the top, wrist facing toward you
  • Keep your arm straight as you begin to cross the body.
  • Continue to move your hand up, making a large circle with your hand.
  • Keep the wrist facing towards the body
  • Once your hand had has reached 11 O’clock start to twist the wrist outwards while continuing the large circle with your hand
  • Stop twisting once your wrist is facing you again.
  • Continue the circle until you reach the original position

Tips:

  • A strong grip is important in this trick! So press your thumb on to the inside of the hoop
  • Remember to keep your elbow straight throughout. It looks 100% more elegant!

Experiment and Play

  • Experiment with your speed. Start slow and then speed up on the twist
  • Try taking the hoop in the opposite direction. You can alternate between the two.

# 20 Sassy Bow

Time to get your sass on!!! This is a super simple move to do but looks amazing and super sexy!

How:

  • Start with the hoop standing vertically in front of you, both hands gripping from the top.
  • Lift the hoop with both hands
  • Fold the bottom of the hoop into your crotch
  • Fold your body over so your hands are now by the floor
  • Flick your head up and smile
  • Then slowly caress the sides of the hoop until you reach the original position

Tips:

  • Take your time with this one, especially on the way back up.
  • If possible keep your feet together and your legs straight.
  • Stick your butt out and arch your back on the way up for full sass effect
  • Flick your head up before you bring the rest of your body up
  • Remember to smile!

Experiment and Play

  • Play with the head flick, especially if you have long hair
  • Experiment with different speeds to see what works for you


Hula Hoop Fitness – The benefits and how to use your hoop for weight loss.

Have you considered hula hooping for fitness? Are you wondering whether it can help you with your weight-loss goals? Or if it can tone your tummy?

Well, the answer is yes! If you’re looking for a fun way to get fit then you’ll love this article 🙂

Hi! I’m Scarlett, creator of Hoop Plus Fit with over 12 years hooping experience.

In this article I will…

  • Run through some fun facts about hula hooping for fitness
  • My personal experience of how fitness hooping has improved my body
  • My top tips for getting the most out of your fitness hooping workout
  • How hula hooping can help you reach your weight-loss goals

On top of that:

I’ll share with you some guided fitness hooping workouts with me. Practice these regularly and you will start to see results.


So… Let’s start

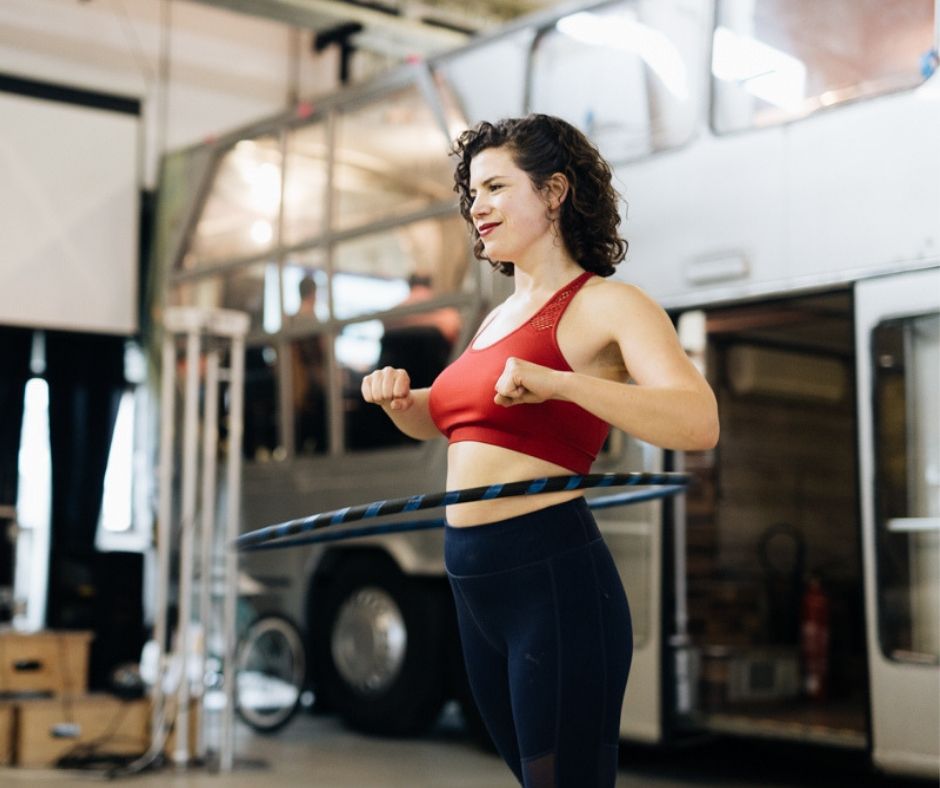
Benefits of fitness hooping


# 1 Fitness hooping burns 420 calories per hour


There have been a number of studies into how many calories hula hooping burns.

  • Some claim that hula hooping burns up to 600 calories and hour!
  • Others give a more modest estimation of 400

However the most conclusive study  was carried out by the American Council on Exercise, who concluded that fitness hula hooping burns on average 210 calories per 30 minutes (or 420 p/hour).

Whats interesting:

Their study was based on 16 participants of varying ages between 16 and 59. Who completed a five minute warm-up and 30 minute hula hoop fitness workout, with heavy hoops.

This is a similar calorie burn rate as aerobics classes or boxercise. It gets the heart rate up over an extended period of time, which helps your body burn those calories.

Obviously it depends on the hoop you’re using, what you’re doing with it and how far you push yourself to determine how many calories you actually burn.

30 minutes can be a long time to hoop, so how can you stay motivated?

The trick is to be inspired, challenge yourself and push your body to new limits of strength and stamina. Obviously going to a class makes it harder to give up. You can check out my regular classes in Berlin.

But home practice also has great benefits. You can get in 10 minuites of exercise when you have 10 minutes to spare.

You can slowly build up to 30 minuites, it can be a challenge at first so start with five minutes and build it up from there.

Feel the music!

Good music has the power to push you further in your training, so be sure to put on your favorite tunes.

In my classes I select awesome DJ sets that motivate the students to keep on going!

It can be challenging to hoop for 30 minutes straight, but feeling the tunes is a great way to reach the next level.

You check out my YouTube channel for some free Fitness Hooping workouts with me. Or equally if you are choosing your own

Tips

  • Work up a 30 min workout. If fitness is your goal, then I’d say that a 30 minute hula hoop workout is a good length of time to aim for. If that’s not available to you today, no problem. With practice you will certainly get there!- Try with just five minutes a day and then work it up to 30.
  • Feel the music. If you really want to work it then put on some you love. You know, something that, when you hear it you can’t help but to start to move your body! – When you really feel the music it is so much easier to push yourself to the next level.
  • Push yourself. Choose music that has a bit if rise and fall – It can be a bit intense to hoop super fast for a solid 30 minutes. So pick something that allows you to occasionally slow… Then speed up with the beat drops!

My Personal Experience

When I do freestyle gigs in clubs and music events I generally keep it to 20-30 minutes. I say 20 so I can keep the energy high thought the whole performance.

However sometimes the DJ or band are so good I completely lose track of time. I finish my set and realise I’ve been hooping with full energy for a solid 40 minutes!

When I’m in a state of flow I seem to gain new levels of energy. I can push my body further and tap into this endless source of energy.


#2 Fitness hula hooping can help you lose weight


Hula hooping is an aerobic exercise that gets the heat beating faster, similar to…

  • step aerobics,
  • swimming
  • cycling

Working up a sweat with hula hooping can cause you to lose weight all over your body.

It’s a high energy yet low-impact exercise. So you can raise your heart rate for an extended period of time without risking damage to your joints, in comparison to something like jogging.

Important: A daily hoop fitness workout can help you reach your weight loss goals.

Obviously, if  you spend the rest of the day on the sofa eating donuts, then any fitness routine is unlikely to make a difference to your waistline. So your fitness hooping routine should be accompanied by a healthy diet.

Exercise regularly… I know you’ve heard that one before – But luckily for us, hula hooping is fun! Exercise does not feel like a chore. It’s something you’ll want to do, not feel like you have to do.

“It’s an ab workout, without the sadness” – This a quote from one of my students that made me chuckle, but I also feel the truth in it. Fitness hula hooping works the body hard but is also fun and satisfying at the same time. Perfect combination!

Tips

  • Hoop regularly! Try to do a daily fitness hooping workout of 5-30 minutes. The consistency of doing this every day will not only help you start to see a slimmer waist, but also greatly improve your hooping skills!
  • Make sure you are working up a sweat! If it’s feeling a bit easy try to speed the hoop up or try a more challenging fitness hooping routine.
  • Break your fitness routine into small achievable chunks! It can feel daunting when there is a long road ahead of us. However if you break your daily routine into small chunks you will eventually build up the strenth and desire to keep going. Try just 5-10 minutes at a time.

My Personal Experience

I have been hooping for a long time. I first picked up the hoop in 2007 and went through waves if intensity within my practice. However one day I made a promise to myself to hoop every day and it was then that I noticed a massive difference.

I have always been someone who has to watch my weight. I have to work hard for the body I have and watch what I eat.

In general I’m a pretty healthy eater. I’m a vegetarian and I love fruit, vegetables and salad… But I also love chocolate, red wine and cheese.

So a period of over indulging (ahm… Christmas… ahm) would always lead to my clothes feeling too tight. I even split a dress in two one day, when bending over in the super market. Pretty embarrassing.


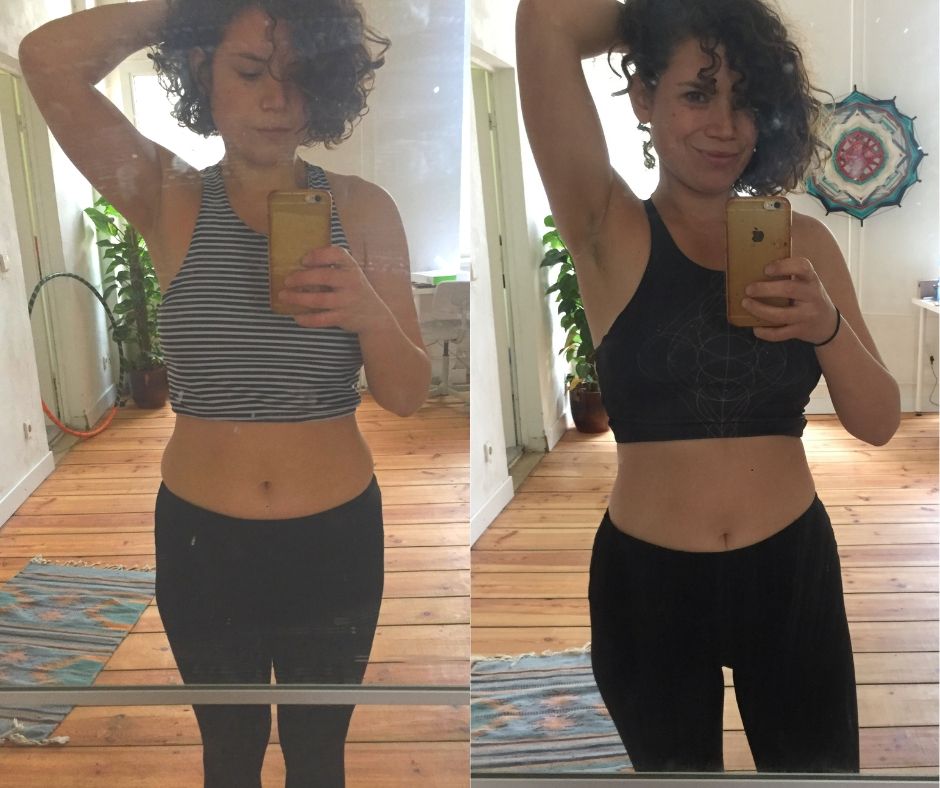
However, once I started to hoop every day, I realised that I could get away with so much more. I relaxed on the diet. I let myself indulge whenever I felt like it (all year round) and my clothes still fit me!

For a while this seemed great. I could finally eat whatever I want and not gain weight! But after some time I decided to reign it in.

Yes, I wasn’t getting fatter, but I also had higher aspirations for myself and my health. So I reduced the over indulgence and again was really pleased with the results. This time with the wight loss, not the calorie intake.


#3 Hula hooping can slim your waist


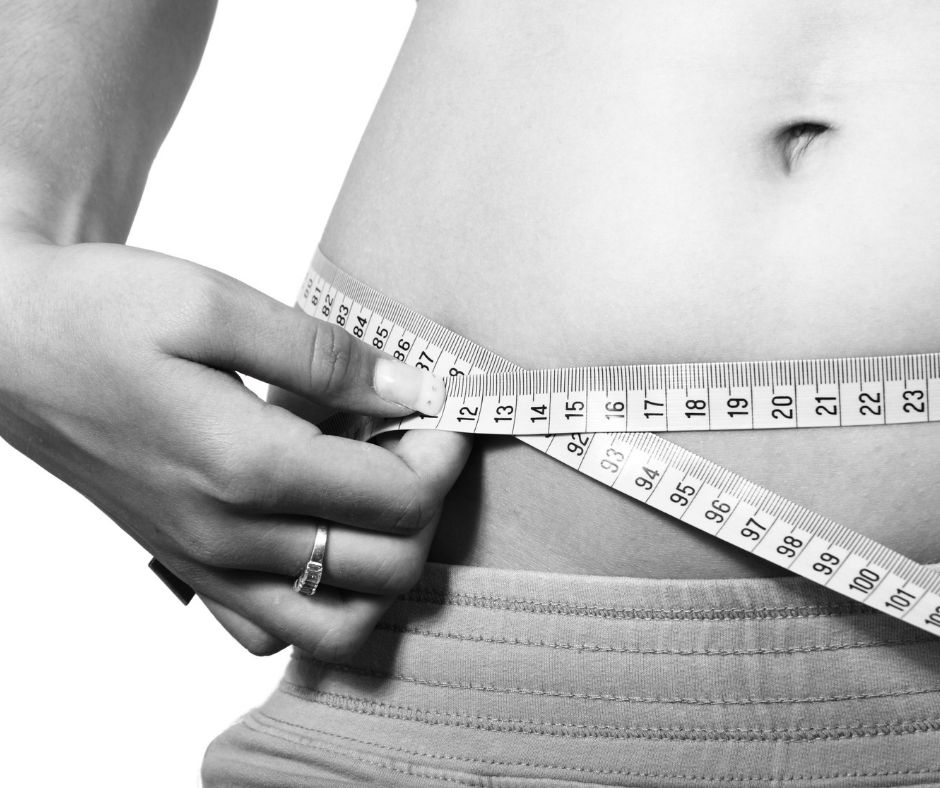
As mentioned above hula hooping can help you to lose weight. Exactly where and how fast depends on your body type and how it stores fat.

In addition to the overall weight loss, it also tones and trains the muscles in the abdominal area. Tightening the muscles in this area can sculpt the overall shape of your waist.

If muscle development is your goal then you will need to also pay attention to what you’re eating. A diet rich in protein and good fats is necessary for improving muscle mass.

Nonetheless, hula hooping alone will not be enough to give you a body builder six pack. Those guys do a lot of weight training and with serious weights! So if washboard abs your goal, then unfortunately hula hooping will not get you there. You will need to do a lot of extra weight training to achieve this.


When we’re talking about fitness hooping we are mainly referring on on-body hooping. So we are mainly targeting the muscles in the abdominal area. Different moves target different areas of the abdomen and you can train them with the right fitness hula hoop workouts.

For example, you can target your upper abs with chest hooping, or work the obliques harder with the Skyscaper.

If toning your tummy is your goal then you can increase the strengthening and toning effect with the type of hoop you use. Fitness hooping is traditionally done using a heavy hoop. However the lighter the hoop the harder it is to keep it going.

So if you want to increase the challenge and the toning effect try a slightly lighter hoop. For example if you’re using a hoop with 25mm (1 inch) tubing and it feels too easy, then try it with hoop with 20mm (3/4 inch) tubing.

Tips

  • Target your ab workout. Just maintaining the hoop spin around the waist is a great start. But if you really want to improve your abdominal strength and tone your tummy then try different fitness hula hoop workouts.
  • Change your hoop. If the workouts are all feeling too easy with your heavy hoop you can challenge yourself with a lighter one. Downgrade in weight and you abs will have to work harder to jeep the hoop up.


#4 Hula hooping improves your balance

Core strength is the key to good balance. When waist hooping, you’re strengthening your core muscles from front to back.

After a stint of regular hula hooping you will start to realise you are able to do things that weren’t available to you before. A while ago I discovered that I could finally ride a bike with no hands! What will you suddenly be able to do?

If improving you balance is your goal you can try a few hula hoop workouts that really target that.

Tips

  • Feet together: Get the hoop going around your waist. If they’re not already work to get your feet together. Remember to push from the belly – By doing this you’re reducing your footprint and increasing the challenge. Think of the Eiffel Tower with it’s feet together.
  • Ballet Legs: Try actually balancing while maintaining the hoop around the waist. – Put you weight in one foot and point the other leg forward. At first you might need to balance with your toes lightly touching the ground, but with practice you’ll be able to lift your forward foot. – Think of a ballerina doing their warm up routine.

My Personal Experience

I have always had a bit of trouble with balance. It’s just my genetics, I guess. In a yoga class I’d always pick a space near a wall or a column so wouldn’t put the other students off with my wobbly stance. Or be pretty fearful when climbing ladders or trees.

However hula hooping had greatly improved my balance! After practicing the above exercises daily I started to realise I could do things I’d never been able to do before – Like riding a bike hands free.

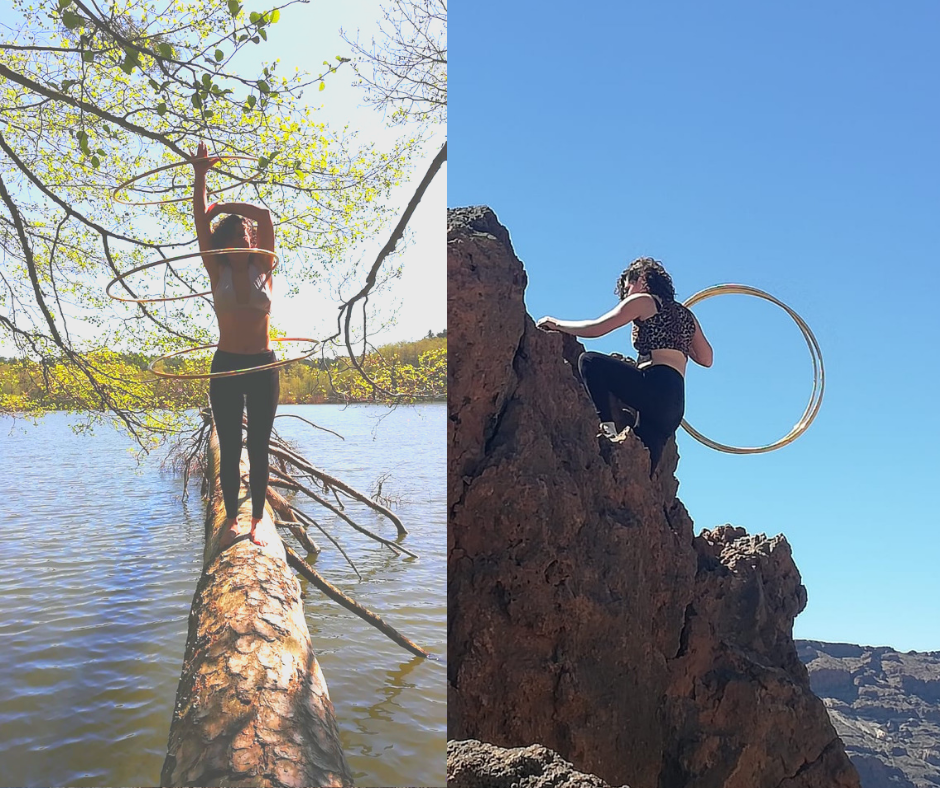
These days I feel more comfortable climbing into high places for cool shots.

Last Easter I went on a trip to the countryside. We were by a lake and saw a tree that had fallen over the water. Before, I never would have dreamed of walking on it, let alone hula hooping on it!

However regular balance training with the hoop around my waist gave the confidence and skill to perform a three hoop split on the tree! Doing that made me really realise how far I’ve come, yet how much better I could be.


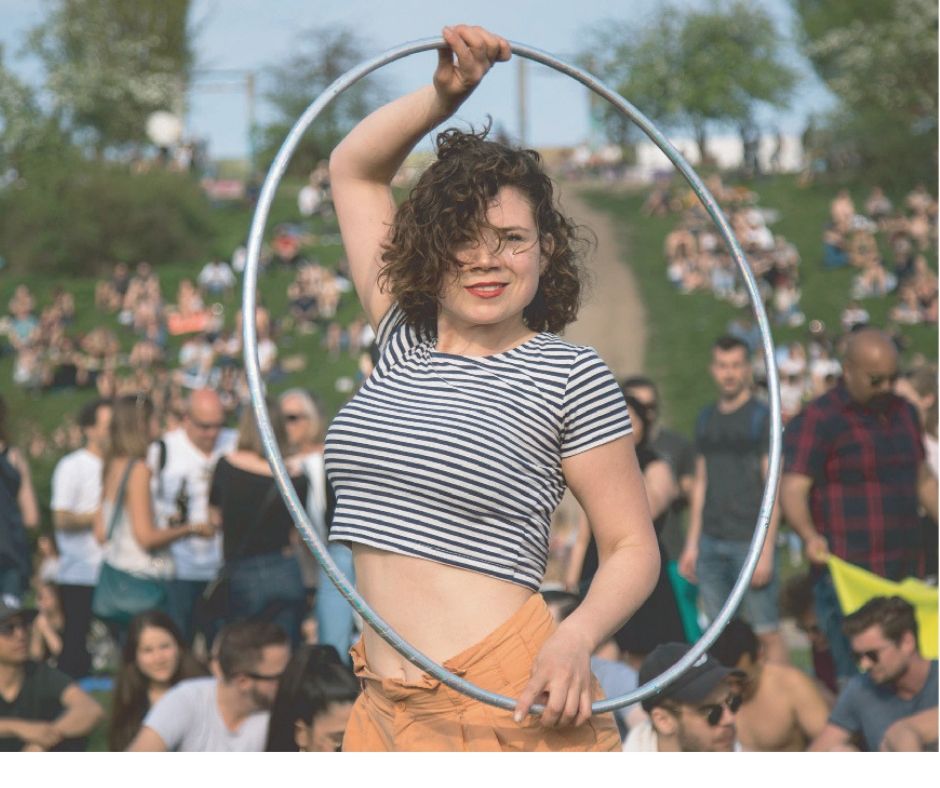
#5 Hula hooping makes you happy

Yes, it’s true, hula hooping is good for the mind as well as the body!

It’s pretty difficult to hula hoop without a smile on your face. It’s a really playful form of exercise which turns people of any age into children. It allows you to engage with your inner child, that you might need to keep locked up inside during your day-to-day life.

It’s also no secret that regular exercise that gets the heart pumping can release endorphins that boos your mood. The added benefit of hula hooping is that it is addictive!

At first somethings can be difficult, even basic waist hooping can be a struggle. But hoppers soon notice that with a bit of practice their bodies are actually able to achieve things they never thought possible. It can boost your confidence and self-belief. Once you’ve felt the satisfaction of nailing a hoop trick or move you’ll get the bug.

Tips

  • Engage with your inner child! Hula hooping is such a playful exercise, so let yourself go.
  • Don’t put too much pressure on yourself. On the flip side of being able to achieve new things with your body. there is the practice and sometimes frustration leading up to it. If something is not working then don’t fret! – Take a break and return to it later. With practice you can always get there.

My Personal Experience

I first picked up the hoop as an adult at the age of 21. I was in Costa Rica and I saw someone dancing with a hoop and thought “I used to do this as a kid, I’ve got try it!”. So I did and I discovered I had some kind of talent for it, I was super pleased with myself.

Once I got back to the UK I bought myself a hoop. I was studying architecture in Brighton at the time. I loved the city but hated my studies, which made me unhappy.

Architecture students out there will know what time talking about. It’s almost a martyrdom, locking yourself in your room for most of the day to complete the work and unfortunately for me I wasn’t particularly good at it.

But luckily, I had a massive room and a hula hoop! If I ever felt sad or like a potato (for sitting at my desk all day) I would pick up my hoop and dance it out! It would always raise my spirits and make me feel good about myself.

In the end I stuck to hula hooping and not to architecture. It still makes makes me extremely happy to this day!.


How to get the most out of your hula hoop fitness workout

Ok, so we know know that hula hooping can be a workout – but how can it be used to achieve weight-loss?

The key things you need to consider here are

  • The type of hoop you use
  • What you do with the hoop
  • How long hula hoop for
  • How regularly you hoop
  • What you’re eating alongside your exercise program

Which hula hoop to use for fitness?

Traditionally heavy hoops are used for fitness whether you’re a beginner or an experienced hooper. The heavier the hoop, the easier it is to keep the momentum.

  • My recommendation: For fitness hooping would be something that (when stood vertically next to your body) comes up somewhere between your crotch and belly button with 25mm/1 inch thickness HDPE tubing. The thick tubing will have enough weight to get the hoop spinning
  • Weighted Hoops: There are weighted hula hoops that are marketed as fitness hoops. These can be useful for some people, but not essential. If you struggle to keep a regular hoop going around the waist then a weighted hoop can help you to achieve momentum.
  • Experienced hoopers: If you’re a more experienced hula hooper, then you can increase your challenge by using a slightly lighter hoop. For example you could move onto a hoop with 2omm (3/4 inch) tubing. This will work your abs harder and help you develop the control to dance with the hoop freely around the waist.


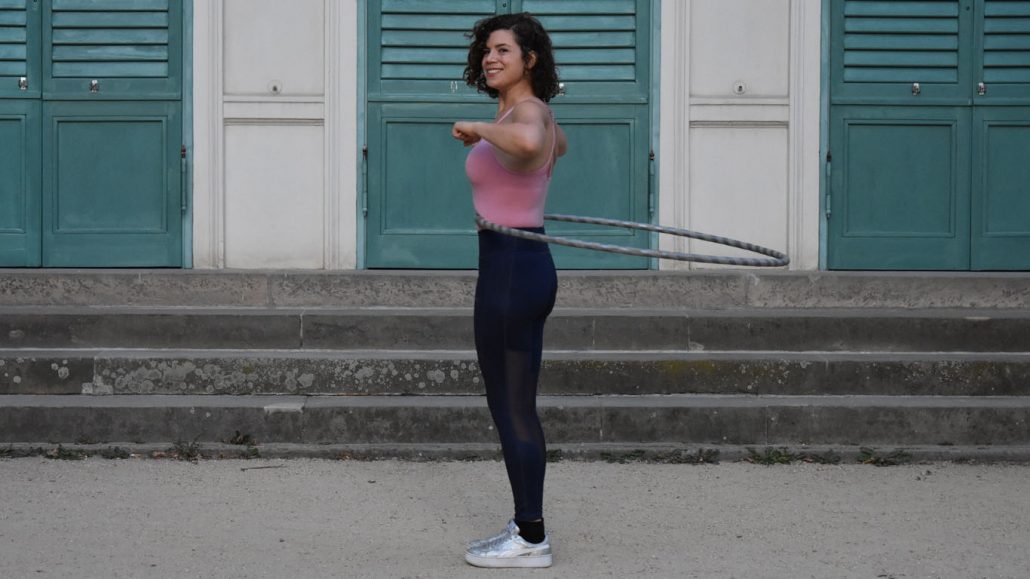
How to hula hoop for fitness?

Fitness hooping is predominately waist hooping, however it can also involve leg and chest hooping, as well as exercises for the arms.

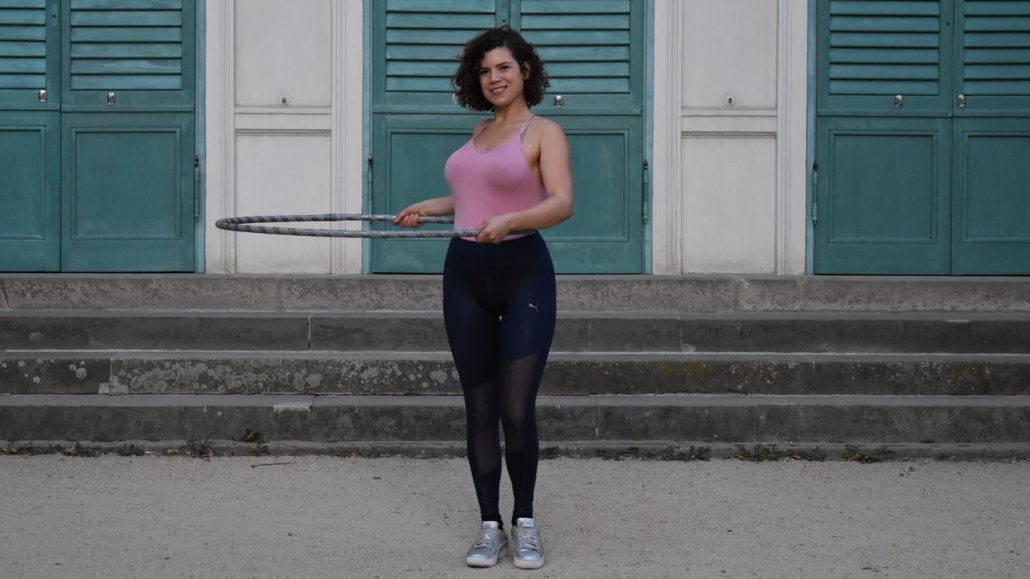
# 1 First tings first:

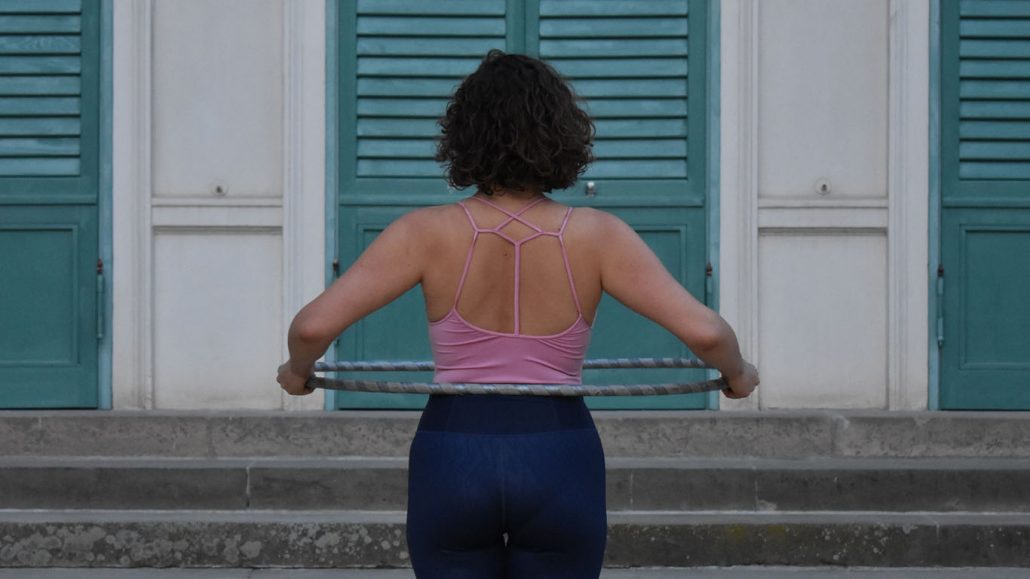
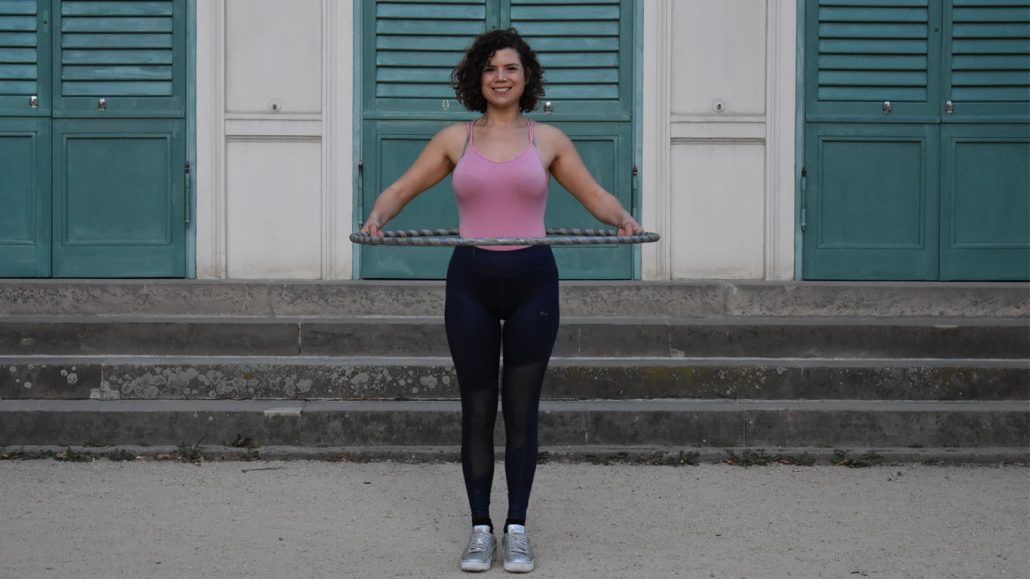
So, if fitness is your goal then you need to get the hoop spinning around your waist.  You also need to make sure that you’re using your core muscles to do this… not you knees or hips.


# 2 Be inspired:

You’ll need to have some motivation to keep on going. Some people who hoop for fitness like to do it in front of the T.V, they put on their favorite program and waist hoop.

For me, it’s the connection between hula hooping and music that really inspires me.  If I’m feeling tired or like I could stop, it gives me that extra push to go further.


# 3 Hoop in both directions:

I know I say it all the time, but guys, I just can’t stress it enough. Hula hooping in both directions is so important!

It might not be as fun at first but improving your weaker direction will greatly improve your good one. It also ensures you develop even muscles on both sides of your body and protects your back.

Last year I met a fellow professional hooper. She came to my Hoop Plus Jam while she was in Berlin. We were discussing the importance of hooping on both sides and she told me that she was training a six hoop split for a show.

She had been drilling this for days and then started to feel pain in her back. She went to the doctor and he told her that her muscles were pulling her spine in one direction. Since then she trains both sides equally and doesn’t have back pain anymore.

Now I know that not everyone will be drilling six hoop splits everyday, so it’s unlikely that ten minutes a day of fitness hooping would have a similar effect. However it’s important to note that hooping in both sides will ensure you’re working  the entire core muscles.


# 4 Make hooping a habit: 

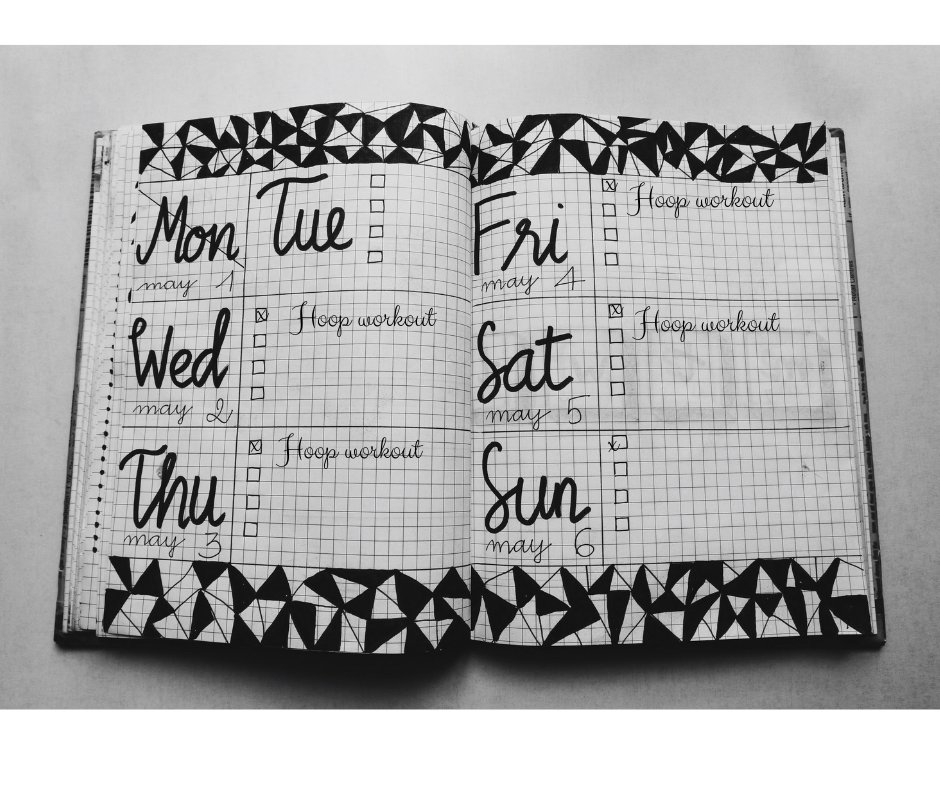
For most hoopers its more than a habit, its an addiction. You can get there too.

If, at the beginning you need some help in motivating you to get the hoop out in the first place then the best thing you can do it put a quick fitness hooping session into your daily routine.

I have a morning routine that I stick to – 20-30 minutes of yoga and 15-30 minutes hula hooping. I have a core workout that I do everyday and then If I have more time then I will extend it and add more.

By making this my habit, it feels odd of I don’t do it. Of course there are days when it doesn’t happen, like if I have an early flight or appointment but those days are the exception.


# 5 Do your hula hoop fitness workout first thing in the morning.

I know there are many things that can get in the way – like work or getting the kids ready fir school. Or things you’d rather do – like big breakfasts or sex.

But doing your daily fitness hooping before breakfast means that you are burning calories at when your body is in fast mode. You haven’t eaten since the day before, so your body is running on it’s existing resources. It’s the peak time for fat burning!

I think the morning is the best time to do your daily workout as it wakes your body up and sets you up for the day. Furthermore, I find that if I don’t get it over and done with first thing, then I struggle to find the motivation to start it later on in the day.


# 6 Don’t give up.

If fitness is your goal, then I’d say that a 30 minute hula hoop workout is a good length of time to aim for.

If that’s not available to you today, no problem. With practice you will certainly get there!

If the hoop falls down, that doesn’t end the workout. Just pick it back up and start it again. We all drop the hoop every now and again, even the professionals.

It makes it all the more satisfying when you get further than your last fail.


# 7 Don’t be hard on yourself and have fun.

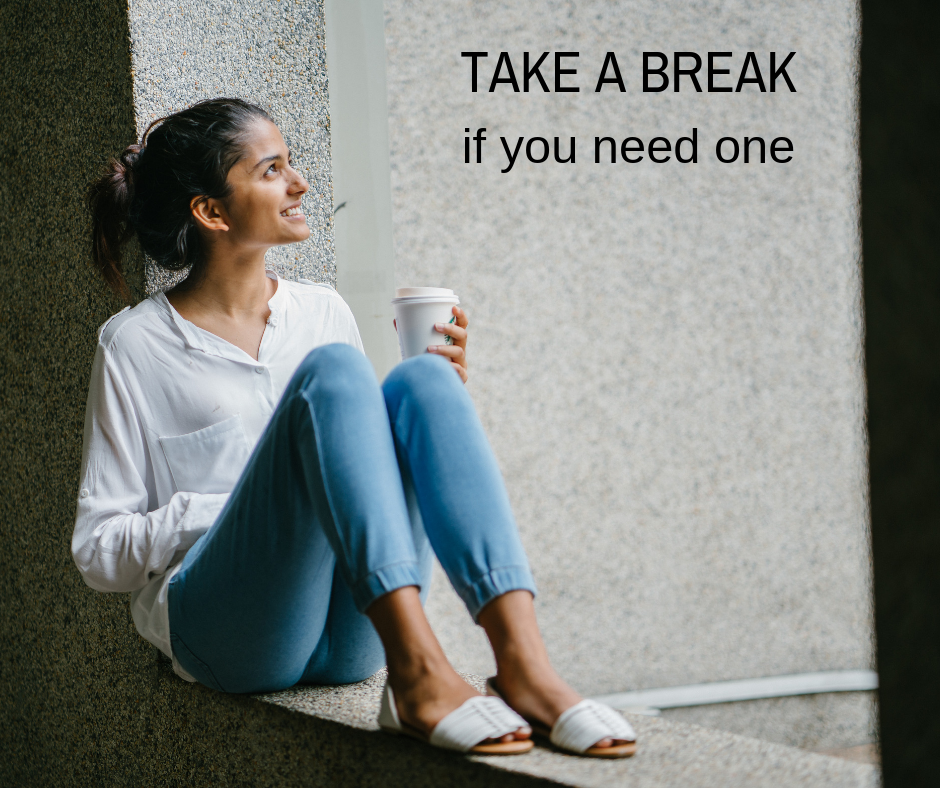
We are often our own worst critic. Especially when we are in self-improvement mode.

So if something is not working it is good to take a little break and return to it later.


In conclusion….

Hula hooping is a great way to help you achieve your fitness goals. You burn on average 7 calories a minute, similar to step aerobics and boxercise. It raises the heartbeat and helps to encourage weight-loss  all over the body.

Waist hooping strengths then core and tones the abs. This in turn, tightens the overall shape of your waist.

Regular fitness hooping must also be accompanied by a balanced healthy diet if you want to see weight-loss results.

You are also unlikely to build large muscle mass and gain a six pack with hula hooping alone. But can see a tucking in of the waist the more you hoop.

To see good results you have to hula hoop regularly. Three to seven times a week will help you see great improvement in your body, mind and skills.


Are your looking for a fun way to work off the extra pounds? Have you tried workouts before and struggled to maintain it?

Are you considering hula hoop workouts?

If so, then you will love this article!!!

Hi, I’m Scarlett from Hoop Plus Fit, professional hula hoop teacher performer with over 12 years hooping experience.

In this article, I’ll show you…

  • … My top 15 hula hoop workouts – guaranteed to work the abs and work up a sweat.
  • … How to choose the hula hoop that is right for you.
  • … Why its important to swing both ways (hoop in both directions)

On top of all that:

Guided hula hoop workouts with me that will get you moving today! Add these workouts to your daily routine and you will see results.

Designed for your level – Beginner and experienced hooper workouts available – find the best hula hoop workout for you!


15 Hula hoop workouts for the abs arms and legs

These hula hoop workouts will make you work up a sweat and work the abdominal area while having fun! The majority will work the abs, however the legs and arms will also get a workout too.

Absolute beginners and experienced hula hoopers can benefit from these exercises.  Put on your favourite your favourite music and give these hula hoop workouts a try! Or try a guided workout with me on my YouTube channel – Hoop Plus Fit.


1# Waist hooping: The core of it all

Waist hooping lays the foundation for all hula hoop workouts – it’s the first and also most important skill. Follow my instructions and you will get a great workout from step 1.

How to do it:

  • Legs: Planted firmly on the ground – work to get your feet together
  • Arms: In neutral, hands by your chest – for more of a workout hold your hands in fists, strong biceps
  • Action: Push from your belly button, back and fourth motion with your hips. Chest up, don’t bend forward.


Why you should do it:  By focusing on rotating the hoop in a back and fourth motion from the belly you get a strong core workout. It is possible to hoop by moving your hips side to side however that motion does not work out the core muscles to the same extent.

My top tips:

  • Tip: Wind the hoop up and push with force! The more momentum you give it at the beginning the easier it is to keep it up
  • Tip: Make sure the hoop is flat at push-off. Wonky hoops can cause the hoop to go out of control. No one wants a hoop to the face.
  • Tip: If the hoop starts to fall down, hoop faster. You can also bend your knees slightly, bringing your waist closer to the hoop.

Now stop the hoop, reverse it and do the same on the other side: Adopt the same position as before except this time wind the hoop up in the opposite direction. This can be a challenge, particularly in the beginning of your hoop journey.

Training out weaker side means that we develop even muscles across the core. In particular we are protecting our backs from injury by ensuring an even distribution of muscle development.  It may not be as fun at first but with practice anything is possible.


2# Christ the Redeemer

Imagine you are the Christ the Redeemer statue in Rio de Janiero, Brazil. Bring your arms out to the side, while maintaining your waist hooping.

How to do it:

  • Legs: Planted firmly on the ground – work to get your feet together
  • Arms: Out to the side, fingers together, palms facing the wall – strong arms, like you’re pushing the air in front of you. Shoulders down.
  • Action: Push from your belly button, back and fourth motion with your hips. Chest up, don’t bend forward

Why you should do it: By pulling our arms out to the side we start to elongate the abs as we work them. It makes it more of a challenge to keep the hoop up but also builds greater strength.

My top tips:

  • Tip: Remember to keep your chest up! There is a tendency to lean forward when you start to lose control, this won’t help.
  • Tip: Get the hula hoop comfortably spinning around the waist before lifting your arms

Now stop the hoop, reverse it and do the same on the other side: If the hoop won’t stay up in the weak direction in this exercise, you can take a step back to the previous exercise – so in this case it would be ‘2# Waist hooping – Arms in neutral – Weak direction’.


3# The Skyscraper

Continue waist hooping and raise your arms to to the sky – This one really challenges you makes an awesome workout! It’s also great preparation for multi hooping.

How to do it:

  • Legs: Planted firmly on the ground – work to get your feet together
  • Arms: Up to the sky, fingers together, palms facing the wall – strong arms, like you’re pushing the air in front of you. Shoulders down, we don’t want to create any extra tension in the neck.
  • Action: Push from your belly button, back and fourth motion with your hips. Chest up, don’t bend forward

Why you should do it: By lifting our arms even higher we lengthen the abdominal muscles even more. This exercise not only works the abs harder, it also prepares you for the first multi-hooping exercise – waist and hand.

Tips:

  • Tip: Push harder to speed up the hoop before lifting your hands. This will give you some time to get comfortable in this position.
  • Tip: Really stretch up top the sky, this will help you to engage the abs in this position.
  • Tip: In order to increase the challenging, you can put one hand in front of the other – really stretch up, shoulders down and push with force from your belly button.

Now stop the hoop, reverse it and do the same on the other side: If the hoop really won’t stay up in the weak direction in this exercise, you can take a step back to the previous exercise – so in this case it would be back to ‘2# Christ the Redeemer’


4# Ballet legs – Right 

Imagine you’re a ballerina! Point your toes – straight legs. This one is great for improving your balance!

How to do it: 

  • Legs: Weight goes into your left leg, right leg is straight and points forward. Either let your right big toe rest on the ground for stability or lift your foot above the ground.
  • Arms: In neutral, hands by your chest – for more of a workout hold your hands in fists, strong biceps
  • Action: Push from your belly button, back and fourth motion. After 20 rotations point your toe to the side, then 20 rotations later take it to the back. End with feet together – ready to take your left leg forward.

Why you should do it: This exercise helps to improve your balance as well as strengthening the core. By decreasing your stability you force the core muscles to work harder to keep the hoop spinning.

When lifting your leg in the air you also get a stronger workout in the oblique muscles. As well as woking the hip abductors and gluteus maximus and minimus.

My top tips:

  • Tip: Try not to have any weight on your front foot. The goal is to eventually lift it in the air, so get your standing leg used to taking all the weight.
  • Tip: Make sure your hips are square, front leg is straight and toes are pointed.
  • Tip: If you have your leg in the air, try to turn your big toe in slightly – this will help to square the hips.
  • Tip: Keep your body straight. Chest up, don’t bend forward

Now stop the hoop, reverse it and do the same on the other side: You may be able to lift your leg while spinning in your dominant direction but not in your weal one. That’s ok, we need to build this strength. So if you need to, take a step back and keep your extended toe on the ground for stability.


5# Ballet legs – Left

Now take to the left leg – Go back to hooping on your dominant side, phew!

How to do it:

  • Legs: Weight goes into your right leg, left leg is straight and points forward. Either let your right big toe rest on the ground for stability or lift your foot above the ground.
  • Arms: In neutral, hands by your chest – for more of a workout hold your hands in fists, strong biceps
  • Action: Push from your belly button, back and fourth motion with your hips. After 20 rotations point your toe to the side, then 20 rotations later take it to the back. End with feet together – ready to take your right leg forward.

My top tips:

  • Tip: Try not to have any weight on your front foot. The goal is to eventually lift it in the air, so get your standing leg used to taking all the weight.
  • Tip: Make sure your hips are square, front leg is straight and toes are pointed.
  • Tip: If you have your leg in the air, try to turn your big toe in slightly – this will help to square the hips.
  • Tip: Keep your body straight. Chest up, don’t bend forward

Now stop the hoop, reverse it and do the same on the other side: You may be able to lift your leg while spinning in your dominant direction but not in your weal one. That’s ok, we need to build this strength. So if you need to, take a step back and keep your extended toe on the ground for stability.


6# The Booty Builder

Want a Beyoncé booty? This waist hooping / Plié squats combo will work your glutes up a treat!

  • Legs: Take your legs slight wider than hip width apart and turn your feet out around 45 degrees.
  • Arms: In neutral, hands by your chest – for more of a workout hold your hands in fists, strong biceps
  • Action: Get the hoop comfortably spinning around the waist. Then bend at the knees and sink down. Keep your back straight as you go down, no leaning forward. Engage your inner thighs to keep you balance and a strong stance. The straighten your legs and come back up to standing position.

Why you should do it: Plié squats engage your glutes and inner thighs. By strengthening these muscles you are working towards a curvier, more lifted booty. It won’t make you look  You’re not necessarily going to look like Kim Kardashian over night but doing this exercise regularly will give your butt a noticeable lift. It also works to open the hips and improve flexibility in this area.

My top tips:

  • Tip: Keep your back straight as you sink down – don’t lean forward. If that means that you can only go down a couple of cm that is ok! Work with where your body is now and with practice you’ll get further.
  • Tip: Press into your big toes and engage your inner thighs as you sink down.
  • Tip: Don’t let your knees turn in. Keep your legs strong.
  • Tip: Get the hoop spinning fast and strong before bending your knees. – It’s most challenging to keep the hoop spinning around the waist when you are at your lowest point. So pump it a but harder before you journey down.

Now stop the hoop, reverse it and do the same on the other side: Work to get the hoop comfortable on your weaker side with your feet in the Plié position first. Start to sink down only when this feels comfortable.


7# 4 Point Pivot

Turn in a circle – same direction as the hoop spin.

If you’re spinning right-to-left, then your ‘inner foot’ = left foot. If you’re spinning left-to-right then your ‘inner foot’ = right foot.

How to do it:

  • Legs: Put your weight into your inner foot, this one stays on the the ground. Use the outer foot to push yourself in a circle pushing yourself in 4 points. Imagine a cross on the floor, with your inner foot at the centre. You can increase the workout by pulling your heel to your buttocks as you spin.
  • Arms: Can either be in neutral or for more of a challenge you can bring your arms out to the Christ the Redeemer position as your outer foot hits the ground.
  • Action: Get the hoop comfortable in your dominant direction. We are going to turn in the same direction as the hula hoop, put the weight on the inner foot and use the other to pivot around in a circle in 4 steps.

Why you should do it: This workout is great for improving your balance, coordination and timing. The more you put in the more you’ll get out. The waist hooping and arm movement works the abs, while the leg raises work the legs.

My top tips:

  • Tip: Take your time! Your first quarter turn might cause the hoop to be come unstable (or fall). If the is the case work to get the hoop stable again before you turn.
  • Tip: You can speed up the hoop by pumping harder and faster before the turn. This helps to keep the momentum going.

Now stop the hoop, reverse it and do the same on the other side: Stability is key. Make sure the hoop feels stable before you turn.


8#  360 Anti-Spin

Now you will spin in the opposite direction as your hula hoop. This is harder and you will need to pump harder.

How to do it:

  • Legs: Spinning right-to-left? Right foot = inner foot. Spinning left-to-right? Left foot = inner foot.
  • Arms: In neutral, hands by your chest – for more of a workout hold your hands in fists, strong biceps
  • Action: Get the hoop spinning comfortably and strong. Put your weight onto your inner foot and use your outer foot to pivot around. You can use smaller and more frequent steps to get yourself around a full 360 degrees.

Why you should do it: Spinning the opposite direction as your hula hoop causes you to pump harder and faster. This will raise your pulse and get the blood pumping more. It also improves balance, coordination and timing. All essential skills for hula hooping.

My top tips:

  • Tip: Get the hoop spinning fast before starting this exercise.
  • Tip: Take small frequent steps to get yourself all the way around.
  • Tip: Try this exercise on your tip-toes. This may help you get the speed you need to complete the 360 degrees.

Now stop the hoop, reverse it and do the same on the other side: Get the hoop spinning fast before you anti spin.


9# Funky Side Step

Introducing the fancy footwork! Getting your feet moving ins the first step to freedom of movement with the hoop.

How to do it:

  • Legs: Start with your feet together (or as close together as possible). Then step your right foot out to the side – hip width apart. The bring your left foot to meet the right. Then back in the opposite direction.
  • Arms:Can either be in neutral or for more of a challenge you can bring your arms out to the Christ the Redeemer position as you step out.
  • Action: Get the hoop comfortable, then work in the side steps. At first this may feel challenging so take your time between steps. To speed up you can space your movements between counts of 4, then 2, then 1. Until you are side stepping to every beat.

Why: These side steps not only engage the core muscles but also improve balance and coordination. If you’re interested in dancing with your hoop then this is the fist step to getting moving.

My top tips:

  • Tip: Try to time your steps with your belly thrusts. So when the hoop is against your belly you push forward and step at the same time
  • Tip: However also try not to think about it too much. Get a feeling for where the hoop is touching your body, closing your eyes could help with this

Now stop the hoop, reverse it and do the same on the other side: You may need to move a little slower and take longer to stabilise yourself yourself after reach step. However it’s possible! Just keep at it.


10# The Lightning Bolt

This is essentially an air crunch, while using the hoop to keep even spacing between arms and body.

How to do it:

  • Legs: Put your weight into your left leg, with your right foot pointed out to the side. Later we will work the other side.
  • Arms: Hold the hoop with both hands at the halfway point of the circle. Hands are on the inside of the hoop with the wrists facing outward.
  • Action: Raise the hoop above your head and twist to the opposite side as your outstretched leg – With the right leg to the side, twist your upper body to the left. Your right arm should be near your face and the left arm behind the body.
  • Action: Next engage your abdominals (pull them in and flex them – like you’re preparing for someone to punch you in the stomach) as you bring your right knee towards the belly button.
  • Action:At the same time twist your upper body back to centre, bringing the hula hoop down as you go. The left hand should meet the right knee at the centre. Hold for a breath, then twist back to your start position.

My top tips:

  • Tip: Slow it down. Try to do this exercise slowly and with control. This will ensure you are using the correct muscles to lift your leg.
  • Tip: No weight on the outstretched leg. Work towards keeping your pointed toe hovering above the floor. If you need to stabilise yourself you can let it touch the floor but don’t push off from that foot to raise your leg.
  • Tip: Balance! If balancing here is too much at the beginning, you can take the hula hoop to the side (or your hand to the wall) and use it to stabilise yourself. Practice just the leg raises here to grow your balance practice. Once this feels easy you can move onto the original exercise.

Now stop the hoop, reverse it and do the same on the other side: Maybe your balance is better on one side than the other. That’s ok, thats why we’re here, to work on it.


11# Do the twist

This is an awesome warm-up / cool-down move – Try to time your twists to the beat.

  • Legs: Feet begin planted to the ground, hip width apart. To lengthen the stretch during the twist you can point your outstretched toe.
  • Arms: Hold the hoop with both hands, with your wrists and forearms facing up. The hula hoop rests on top of your forearms and hands.
  • Action: Twist your upper body to the left, holding the hoop in your outstretched arms. You can point your right foot for a further stretch. Then swing the hoop to the right. Point your left toe. Swing the hoop from side to side with control.

Why you should do it: Twisting exercises like this one are great for the digestive system and massaging the organs.  After the ab workouts from the previous exercises this one should feel really great!

My top tips:

  • Tip: The heavier the hoop the more of a workout for the arms.
  • Tip: Slow it down and feel the stretch.


12 # The Smear

Smear the hoop around the body. Keep your body in the centre of the hoop. I love to let myself go in the music with this move

  • Legs: Feet begin planted to the ground. They can be together (more challenging) or hip width apart (more stable), whichever you feel more comfortable with.
  • Arms: Hold the hoop with both hands at the half way point. Hands hold from inside of the hoop, wrists facing out. Bring the hoop to the horizontal plane with your body in the centre of the hoop. Keep it a flat as possible!.
  • Action: You hoop is in the horizontal plane. Imagine there is a surface a small distance below (aprox. 30 cm or 12 inches). Dip the hoop down at the front, so it touches the surface. Then roll it around to the side, keeping only one point of contact with the hoop and imaginary surface. Continue to roll around to the back, side and then to the front again.
  • Action: Once you’ve got this action down, you can get bigger with your movements until the hoop smears across your body. Here you want to rock the hoop across the front and back and smear the hoop at the side by your hip.

Why you should do it: This exercise works into your arms and shoulders. Depending on how big you make your movements, you can also work the abdominals and back muscles. This is also a great one to start dancing with. For those of you out there who like to boogie and want to hoop dance, then close your eyes, listen to the music and try to do this action while moving your body to the beat.

My top tips:

  • Tip: Start off small and work your way up to big movement.
  • Tip: Keep your elbows tucked in and your body at the centre of the hoop.
  • Tip: Experiment with keeping your body straight -the only thing that moves is the hoop and your arms – Like the left image
  • Tip: Experiment with keeping your body in the centre of the hoop – If the hoop tips forward, then so do you! This will create a greater workout for the abs. – Like the right image.

Now stop the hoop, reverse it and do the same on the other side: I like to pick a point that the hoop has to hit before I reverse it. Wait until the hoop is at the highest point behind your body. Then reverse it!


13# The Vertical Body Blaster

Time to bend over! Bob on your knees and keep the hoop spinning in the no. 7 position.

How to do it:

  • Legs: Feet begin planted to the ground. They can be together (more challenging) or hip width apart (more stable), whichever you feel more comfortable with.
  • Arms: Hold your arms in neutral or let them hang in from of you. Essentially we just want them out of the way.
  • Action: Bend over forward – ideally we are working towards a clean bend at the hip, like a no.7. If this is not possible, thats ok. Work with where you are at now. However try to keep your back straight and engage your abdominal muscles to support you in this position.
  • Action: Wind your hoop up and push with force – Bob on your knees to keep the momentum going

Why you should do it: Simply holding your body in this position is enough to engage and strengthen the core muscles from front to back. Keeping the hoop spinning here intensifies the workout. It’s also makes for a great hula hoop photo.

My top tips:

  • Tip: Try not to use a hoop that is comes up past your belly button – it might start hitting the floor
  • Tip: Heavy hoops make this one easier.
  • Tip: Don’t forget to bob your knees. This will keep the momentum.
  • Tip: If you can already chest hoop, you can try this without bobbing your knees. Essentially, its the same action as chest hooping but bent over – keep your hips relatively still and let eh movement come from your belly thrusts and chest popping.

Now stop the hoop, reverse it and do the same on the other side: Again, the weaker side is challenging. If you can only manage a couple of rotations before the hoop falls, then pick it up, start it again. And again. And again.


14# Hit Me (Baby)

Time to get funky! This one os a light workout for the arms bit also a great  move to start dancing with.

How to do it:

  • Legs: Feet begin planted to the ground. They can be together (more challenging) or hip width apart (more stable), whichever you feel more comfortable with.
  • Arms: Grip the hoop with your hand – try this exercise with your wrist facing up or down, try both!
  • Action: Swing your hoop side to side and hit yourself. You can jazz it up by mimicking your hoop hand with your other hand, bob and dance with it
  • Action: If you have a weighted hoop and want to try something similar out, you can do a simple hand pass – Swing your hoop towards the front – Grab with your second hand, wrist facing down and swing to the back – and back around again.

Why you should do it: This is a great workout for the arms and wrists. Work to keep the hoop as flat as possible, the more you do this the greater the workout for the arm area. For the hoop dancers out there, this is a great transition move when the hoop is in the horizontal plane.

My top tips:

  • Tip: The more energy you put into this one, the more momentum you’ll give the hoop and the flatter it will be


15# Side Stretch

This side stretch feels awesome after the workout – stretch it out, you deserve it!

  • Legs: Feet together.
  • Arms: Hold the hoop in the vertical plane behind your back. Hands hold the the hoop from the inside, wrists facing out.
  • Action: Stretch up to the sky. With that length in the body stretch to the left. Don’t collapse into the side, but keep your chest lifted and use your core strength to move with control. Breath in, on the exhale lift your upper body back to centre and then onto the right
  • Action: For a deeper stretch you can bend your left knee in as you stretch to the left. Right knee when you bend to the right.

Why you should do it: This is a great exercise to stretch out the obliques. You can do this before and/or after your waist hooping workout. This should feel really good afterwards – I often use this as a resting pose in my classes.

My top tips:

  • Tip: Keep your body in a vertical plane – try not to lean too far forward and back.
  • Tip: Engage your abs before stretching to the side – this will give you greater strength in your movement.
  • Tip: Start off with a small amount of movement – Left image
  • Tip: When moving further – Right image – then make sure you are engaging the abs throughout, the power should come from there.


Guided hula hoop workouts

If you really want to see results then you should drill these exercises for one minute in both your dominant and weak directions. For a free workout videos click here.

Whether you’re a complete beginner or have been swinging your hoop for a while these exercises are suitable for you. Beginners can benefit from the simplicity of the moves, while more experienced hoopers can work to neaten and perfect their body position.

This hula hoop workout is also lays the foundations for multi hooping (hula hooping on multiple parts of the body). So if multi hooping is part of your hoop goals then this is a great workout to train.

5 minute hula hoop workout for beginners


5 minute hula hoop workout for experienced hoopers


Which hoop is right for me?

The answer to this depends on a number of factors:

  • Your size
  • Your experience
  • What you want to get out of your hula hoop workout.

My guide to choosing the right hoop for you

General tips for choosing the right hoop for this workout:

Beginners

  • A general rule of thumb is that the hoop should come somewhere between your crotch and belly button.
  • For beginners large heavy hoops have more momentum and are easier to keep up.
  • Try a large hula hoop (90-100mm dia) with thick tubing (25mm or 20mm) – This is great for getting started.
  • Weighted hula hoops are suitable for this workout routine. These are great if weight loss is your goal.

Experienced Hoopers

  • More experienced hoopers can do this workout with a lighter hula hoop.
  • Try a smaller hula hoop (80-90mm dia) with thinner tubing (16mm or 20mm).
  • If you’re aiming for multi hooping try to do the workout with the lightest hoop you feel comfortable waist hooping with.

Hooping in both directions

Like most people are either right or left handed, the same goes for hula hooping. Ever tried to write your name with your weaker hand?

It usually looks like a three year old has done it. Not the same as the refined script you can achieve with your dominant hand, I’m sure!

However, with practice it is possible to write neatly with your weak hand… And the same goes for hula hooping.

Now, I know it might not be as much fun at first. Beginners might find this really difficult (but not impossible). Experienced hoopers might be taken back to the beginning of their hoop journey. Which, may not feel as good as spinning in the dominant direction.

However! Hooping in just one direction can cause you to develop more muscles on one side of your body. In time this can cause problems with your back. So it’s super important to train both sides.

Getting good in your weaker direction will not only balance you out, but also greatly improve your dominant direction.


Waist hooping

Getting the hoop to spin around the waist is the first step in your hoop journey. It is the core of the hula hoop ab workout, so the first goal is to get this comfortable.

 Beginners – tips for waist hooping: 

  • # Tip 1: Place the hoop around the waist – have contact with the small of your back.


  • # Tip 2: Keep the hoop as flat as possible

  • # Tip 3: Wind it up and push with force!

  • # Tip 4: Try pushing back to front – Push forward when the hula hoop is touching your belly.

Experienced hoopers –  tips for waist hooping

  • Work to get your feet together – straight body.
  • Chest up, really pushing with your belly button
  • Strong arms – hold your hands either in fists or flat with tension in your biceps.

In Conclusion

Waist hooping is a fantastic way to get the blood pumping and strengthen the core! By following these 15 hula hoop workouts on a regular basis, I can guarantee that you will feel stronger in the core.

Waist hooping is the first and most important skill to get. It lays the foundation for the rest of the exercises so try to get this one comfortable first.

Be sure to practice in both directions. This may not feel as fun at first, but it’s worth it. It not only protects your back but also makes your good side better!

Practice makes perfect! Some things may be difficult at first, however with every try it gets easier. You just need to keep at it… And once it clicks, it gives you such an extreme sense of satisfaction, that it can become addiction.